Group resources for side-by-side bookings
If your venue has resources that sit next to each other — adjacent bowling lanes, neighboring tables, connecting rooms — Rex can keep a single party on resources that belong together. When one reservation needs more than one resource, side-by-side grouping tells Rex to pull those resources from the same group so guests aren't split across the venue.
Side-by-side grouping only affects bookings that need two or more resources at once (for example, a party reserving three lanes). A reservation that uses a single resource is never affected. It also requires resource-based inventory — venues that track availability by capacity won't see any change.
Step 1: Group your resources with a Group ID
Open the resource you want to group
Go to the Resources tab for your venue and find the resource you want to edit.
Click Edit and set a Group ID
Click Edit on the right-hand side of the resource, then type a value into the Group ID field (it defaults to "0"). Give every resource that sits side-by-side the same Group ID — resources that share a Group ID are treated as neighbors. Repeat for your other resources, then save.

Example: for an 8-lane bowling alley, put Lanes 1–4 in "Group 1" and Lanes 5–8 in "Group 2". A reservation that needs three lanes will then stay inside a single group. A resource can belong to more than one group — separate the IDs with a comma (e.g. "Group 1,Group 2") for a lane that borders two groups.
Step 2: Choose how strictly Rex enforces grouping
Open the package and find Resource Assignment
Open the package you want to configure and find the Resource Assignment dropdown. This rule is set per package, so you can group resources for some packages and not others.

Pick a Resource Assignment mode
Choose how strictly the system keeps a booking's resources within the same group. The three options are explained below.
Default
No grouping. Rex assigns resources purely by what's available and ignores Group IDs.
Best for: Venues where it doesn't matter which resources a guest gets
Side by Side Optional
RecommendedRex tries to keep a booking within one group, but will still assign across groups when a single group doesn't have enough free resources. A booking is never blocked.
Best for: Most venues — you prefer adjacent resources but never want to turn a guest away
Side by Side Only
Rex will only assign resources that share a group. If no single group has enough free resources, an online guest can't complete the booking.
Best for: Venues where splitting a party would cause real problems — for example, across two floors
Set your Group IDs (Step 1) before choosing a Resource Assignment rule. With no groups configured, the side-by-side rules have nothing to work with and won't change how resources are assigned.
Save and test it
Save the package, then place a test reservation that needs more than one resource to confirm Rex assigns them the way you expect.
Apply grouping to every package at once
If you want side-by-side grouping across the board instead of package by package, turn on the venue-wide "Group Resources Side by Side" toggle under Host → Assign Logic. It applies optional grouping (the same behavior as "Side by Side Optional") to every package left on Default. Any package that has its own Resource Assignment rule set always takes priority over this toggle.
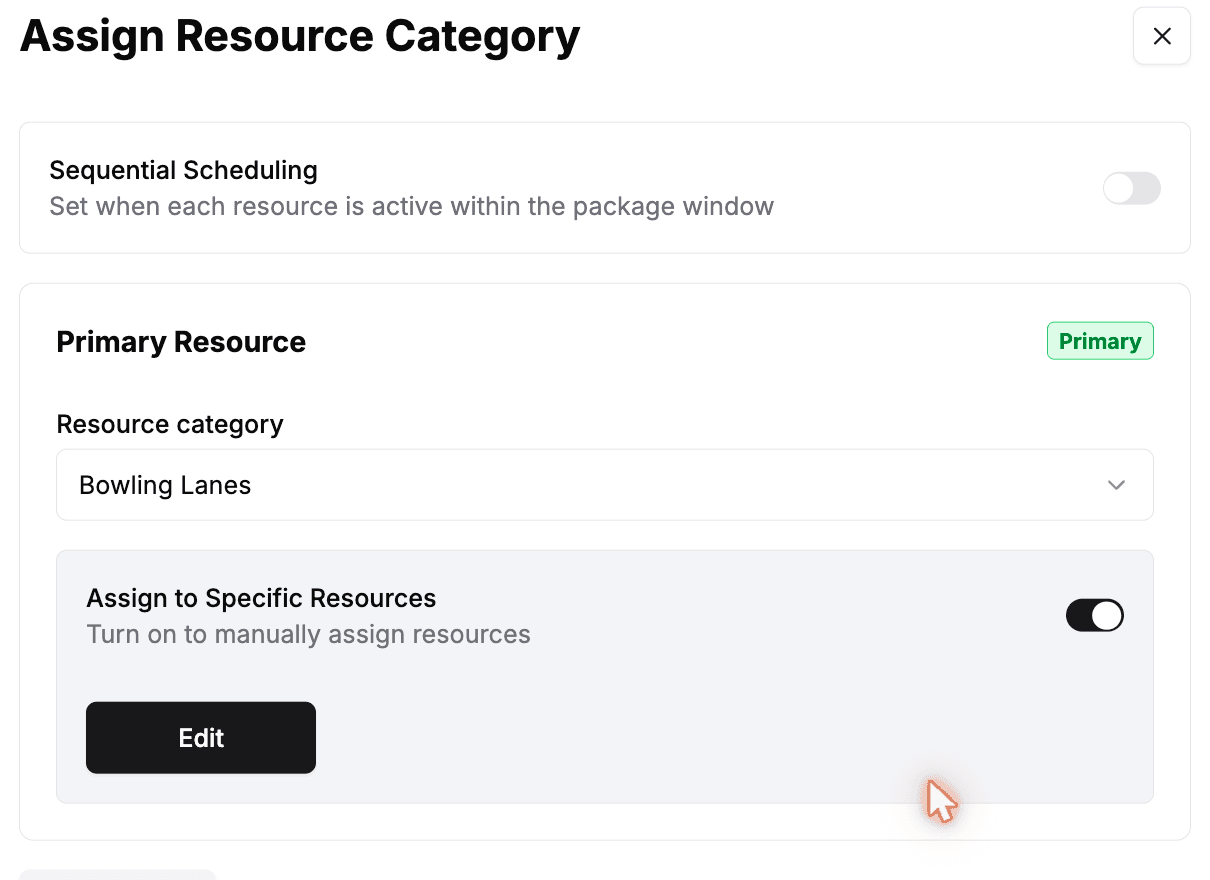
Limit a package to specific resources
Grouping decides how resources are paired up. If you instead want to control which resources a package can use at all, you can pin a package to a hand-picked set of resources inside a larger category — for example, a package that should only ever book Lanes 1–4 of your full Bowling Lanes category.
Open the package's Assign Resource Category settings
On the package, find the Assign Resource Category card and click Edit.
Choose the resource category
Pick the category you want to limit from the Resource category dropdown. If no category is assigned yet, click "Add Item" first, then choose one (for example, Bowling Lanes).
Turn on Assign to Specific Resources
Switch on "Assign to Specific Resources", then click Edit to choose which resources this package can use.
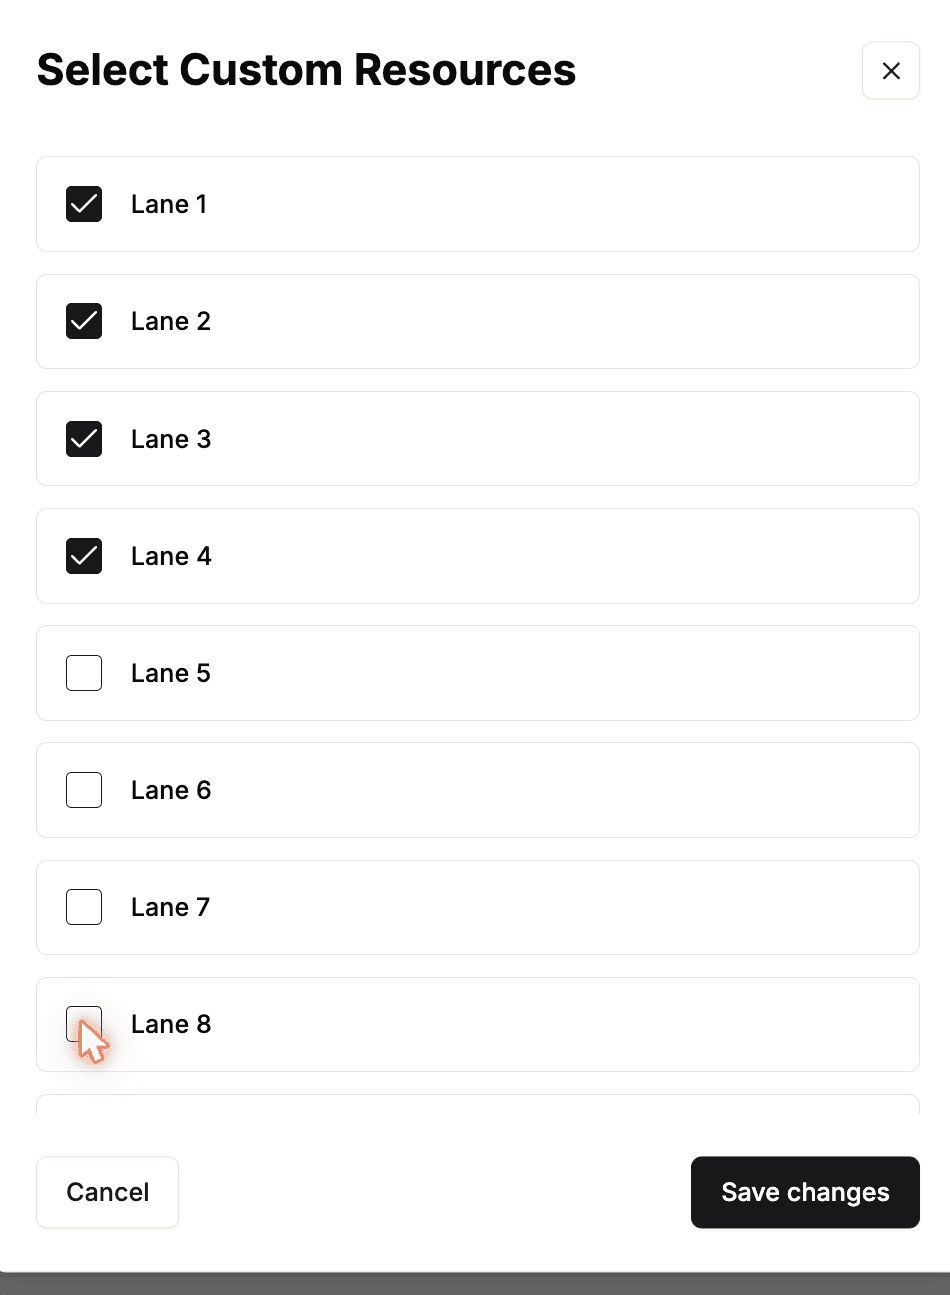
Pick the resources and save
Check only the resources this package should book, click Save changes, then Save changes again on the category screen.
Leave "Assign to Specific Resources" off to let a package use every resource in the category. When it's on, the package can only ever be booked onto the resources you checked — pair it with the side-by-side grouping above to also keep that smaller set adjacent.
Use resources in sequence within one booking
By default every resource a package needs is held for the entire booking. Sequential Scheduling instead lets a single booking move through its resources over time — each resource is only held during its own slice of the package window. For example, a two-hour party could use a bowling lane for the first hour and a party room for the second, leaving the lane free for other guests once the party moves on.
Open the package's Assign Resource Category settings
On the package, find the Assign Resource Category card and click Edit.
Turn on Sequential Scheduling
Switch on "Sequential Scheduling" at the top of the dialog. A Resource Allocation timeline appears so you can see how the package window is divided up.
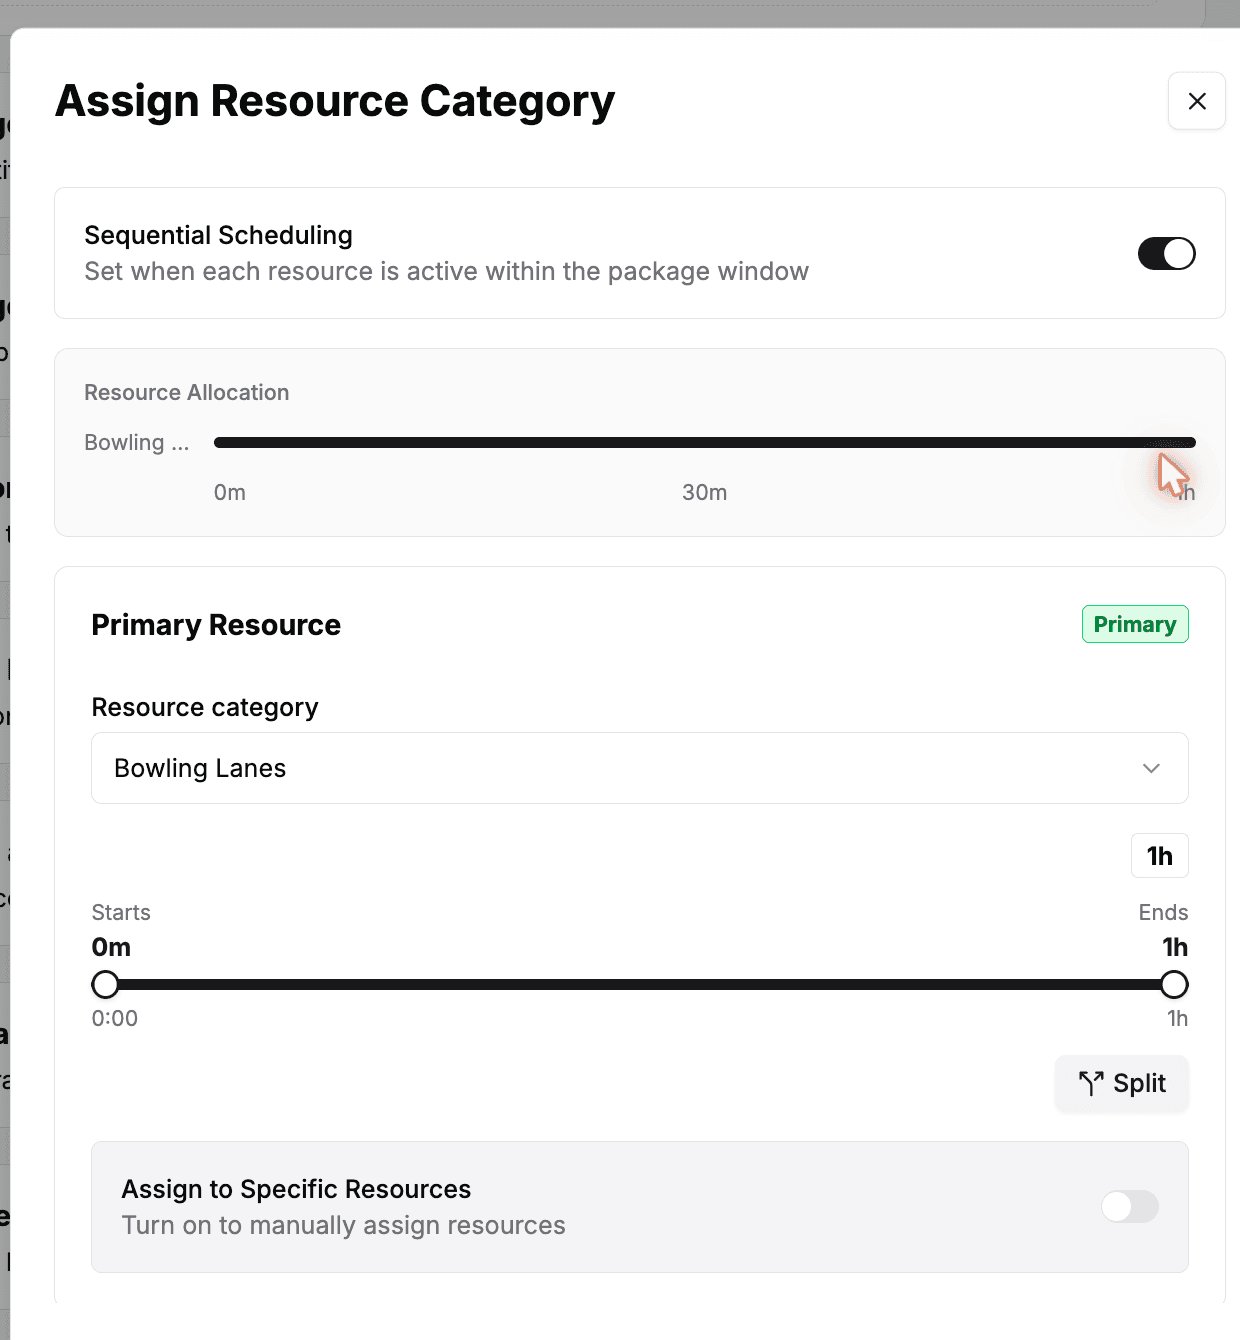
Add and order your resource categories
Click "Add Item" for each resource category the booking should move through, then use the up and down arrows to put them in the order guests will use them.
Set each resource's time window
For each resource, drag the Start and End slider to set when it is active within the booking. Use "Split" if a resource should be used for more than one window. Keep an eye on the allocation bar — a warning shows if any of the package window is left unallocated.
Save changes
Click Save changes when the whole package window is covered.
Sequential Scheduling only applies to packages that use resource-based inventory and have a set duration. Leave it off for packages where every resource should be held for the entire booking.
Updated Jun 19, 2026
Was this helpful?