Create your first venue
A venue is a single physical location in Rex — its address, hours, packages, resources, and payments all live under it. Once your branding and global settings are in place, create your first venue to start building the experience guests will book.
Create a venue from scratch
Open Manage in the left-hand sidebar and click Venues, then click Create Venue.
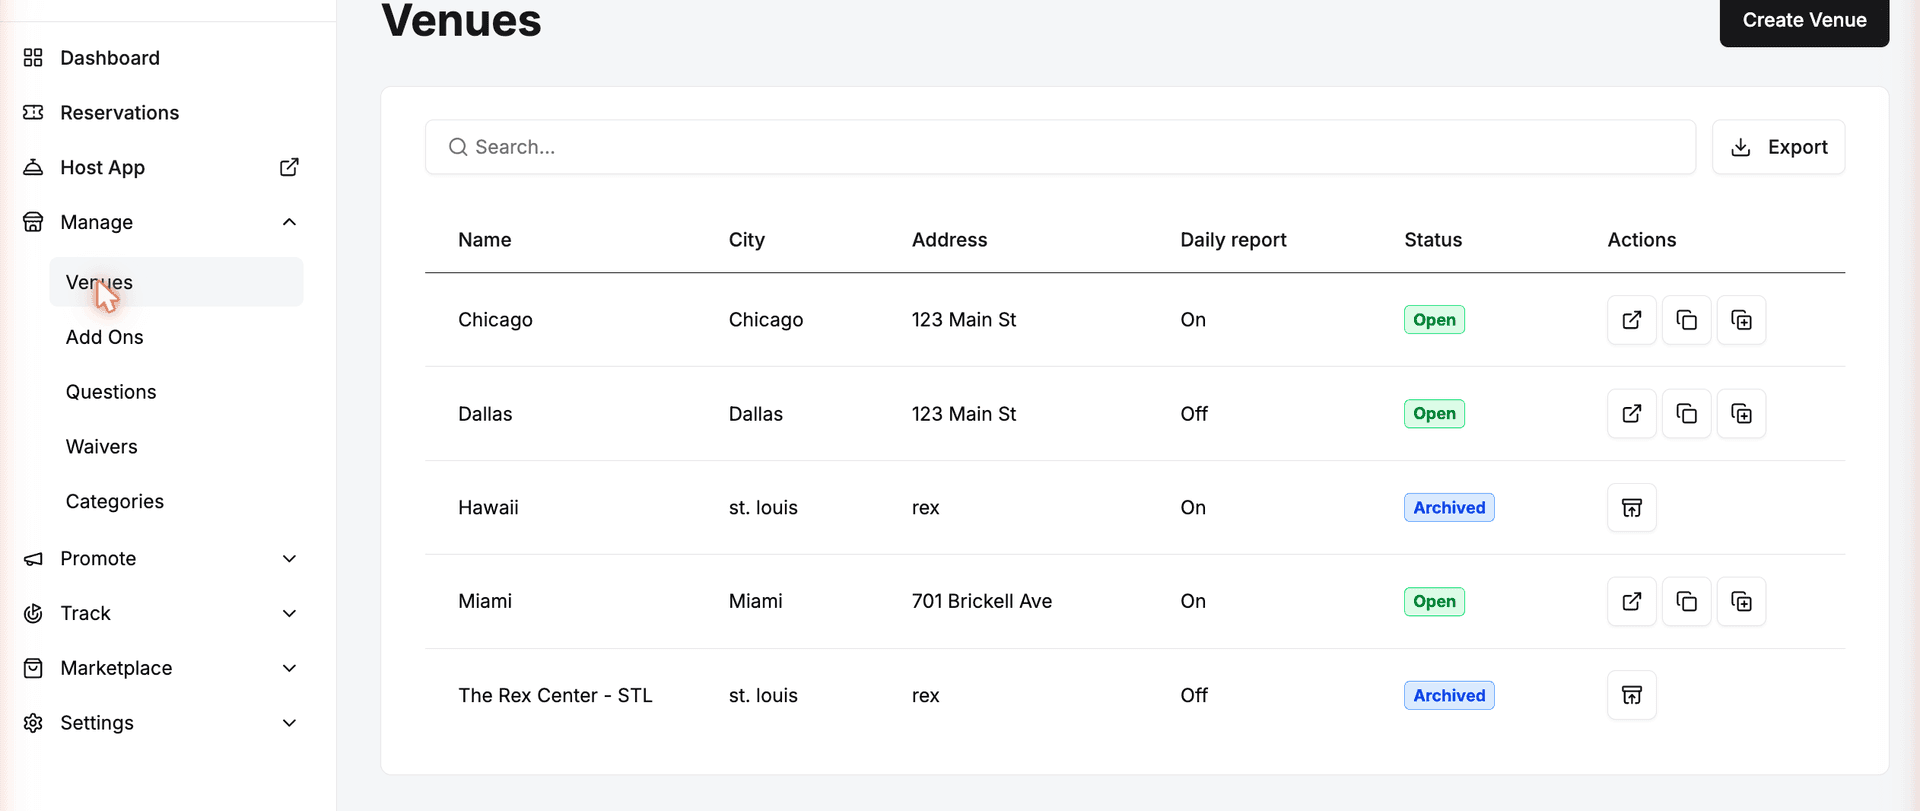
Adding a venue changes your subscription. When you click Create Venue, Rex shows an Add New Venue confirmation explaining that your plan will be updated and you'll be charged a prorated amount for the rest of the current billing period. Click Confirm & Continue to move on to the venue form.
Next, fill out the Venue Info form. These details identify the location for your guests, your staff, and Rex itself.
| Field | Description |
|---|---|
| Venue Name | The name of the location. Appears on the guest-facing booking page and in confirmation emails. |
| Venue Prefix | A short code that's added to the start of this venue's confirmation numbers (for example, a prefix of CHI produces booking numbers like CHI-1042). |
| Address | Street address, with separate Address 2, City, State, and Zip Code fields. Shown on the booking page and in confirmation emails so guests can find you. |
| Phone Number | Main contact number for guest inquiries. |
| Time Zone | The venue's local time zone. Rex uses it to display availability and reservation times correctly. |
| Location Page URL | A link back to your website — your homepage, or a specific location page if you run multiple venues. The venue logo on the reservation page links here. |
| Map URL | The map link for this location. Powers the map link on the booking page. |
| Google Map URL | The Google Maps URL for this location. |
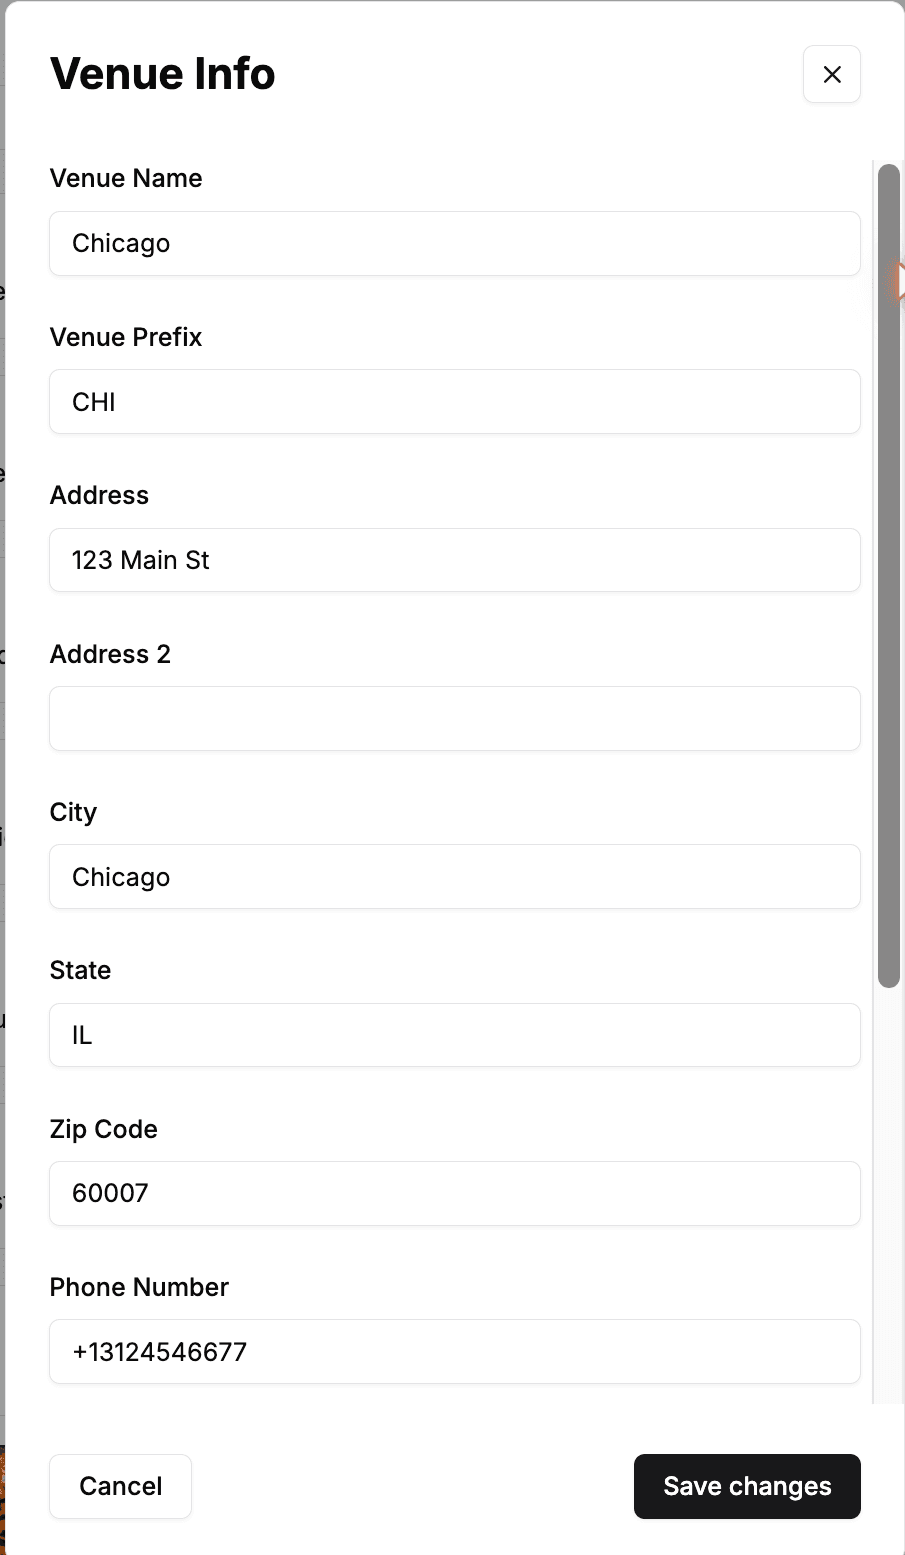
Click Save changes. The venue is created and you land on its detail page, where you finish the rest of the setup.
Configure your venue's settings
On the venue detail page, the General tab holds a set of cards covering everything about this location. A Venue Controls panel sits on the right.
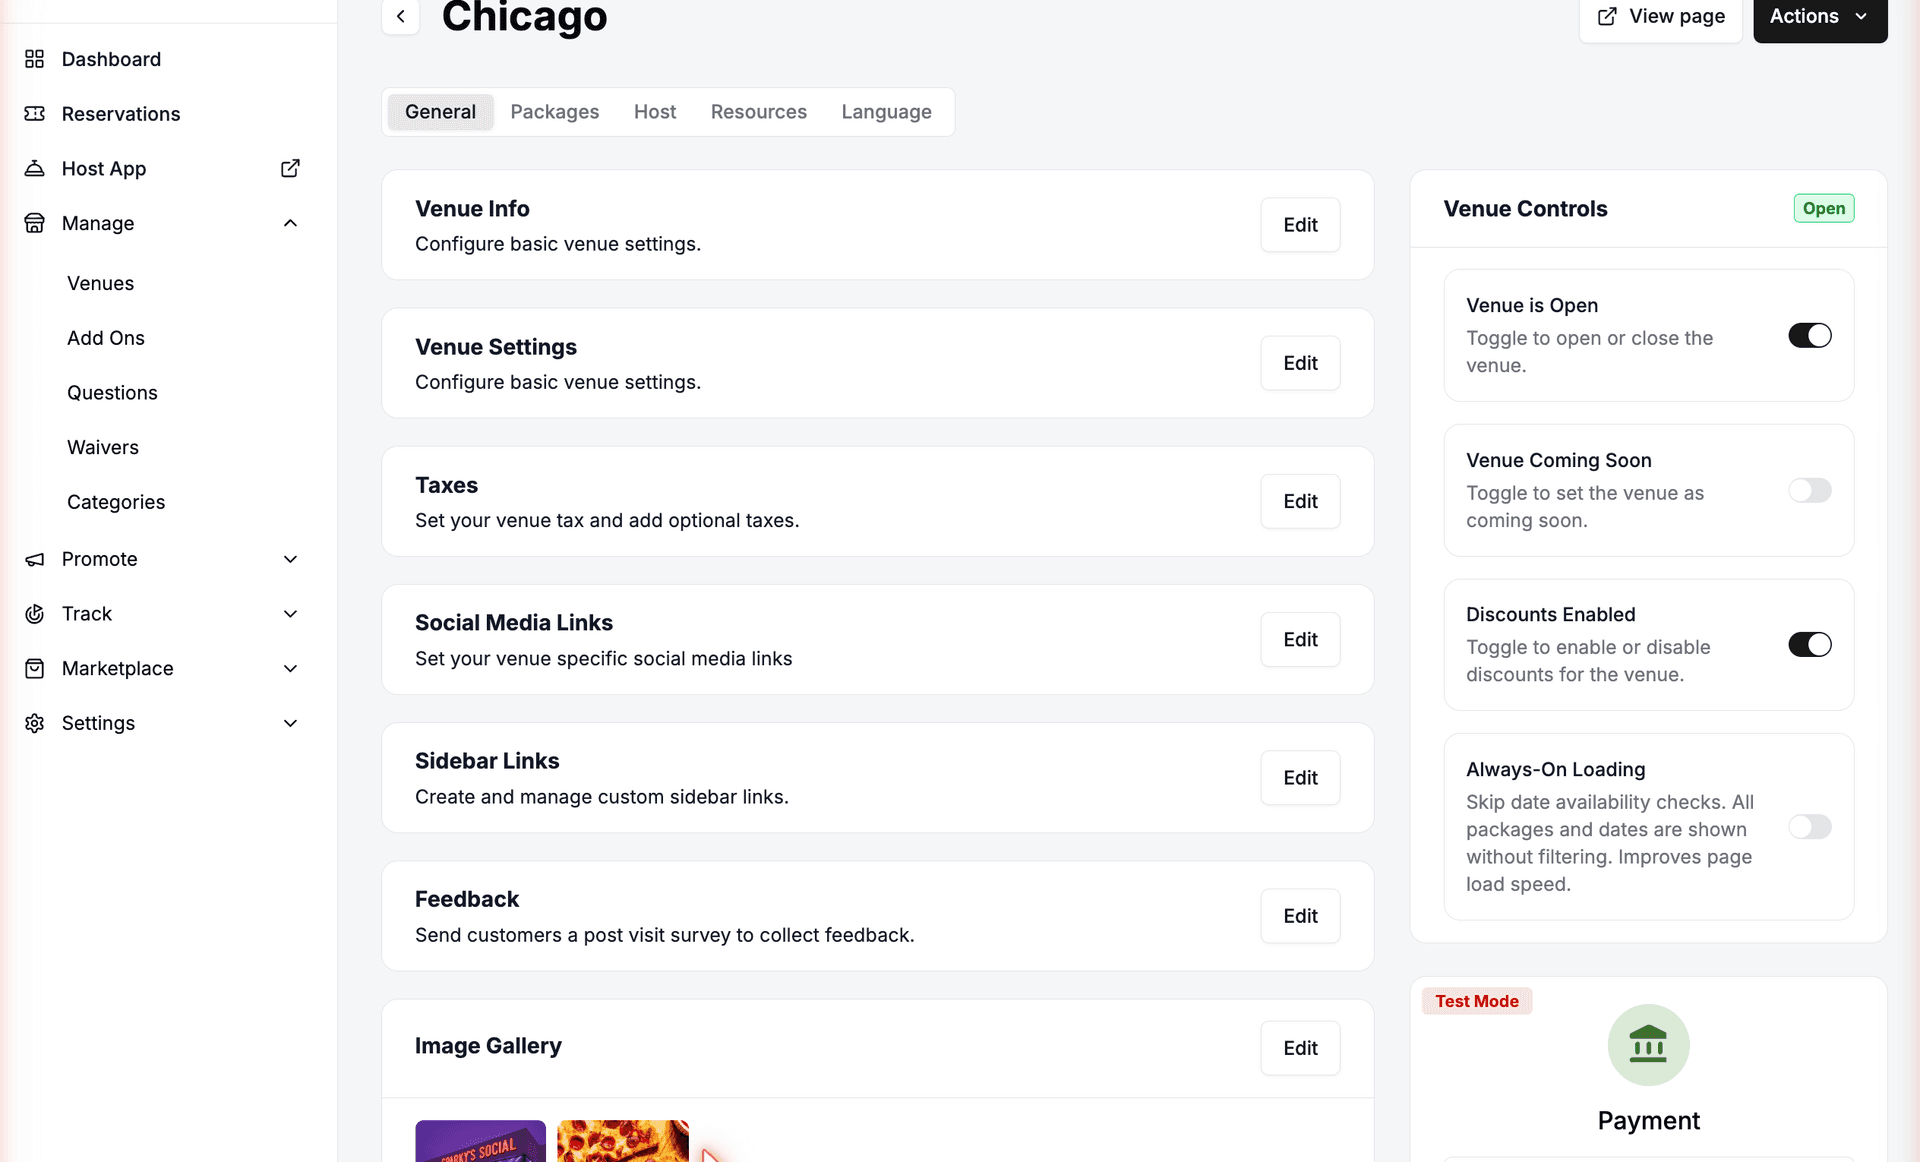
Click Edit on any card to configure it. The cards on the General tab are:
| Field | Description |
|---|---|
| Venue Info | The core details you just entered. Edit them here anytime. |
| Venue Settings | Booking behavior and contact details for this venue, including the email addresses that receive reservation and event notifications. |
| Taxes | Set the venue's tax rate and add any optional taxes. |
| Social Media Links | Links to this venue's social media profiles. |
| Sidebar Links | Create and manage custom links for the venue's sidebar. |
| Feedback | Send guests a post-visit survey to collect feedback. |
| Image Gallery | Upload photos shown on the venue's reservation page. |
The Venue Controls panel on the right has quick toggles: Venue is Open (open or close the venue), Venue Coming Soon, Discounts Enabled, and Always-On Loading.
Turn on Venue Coming Soon in the Venue Controls panel while you finish setup. It keeps the venue out of guests' booking flow but still lets you preview the reservation page. Switch Venue is Open on when you're ready to take real bookings.
Clone an existing venue
If you already have a venue configured, cloning is faster than starting over. Open an existing venue, click Actions in the top-right corner, and choose Clone Venue. Like creating from scratch, cloning adds a venue to your subscription, so the same prorated billing applies.

Cloning copies the source venue's packages (with their pricing and descriptions), schedules, and tax settings into a new venue. You give the clone its own name and address as part of the process.
A few things don't carry over and need to be set up on the new venue:
| Field | Description |
|---|---|
| Resources | Each venue has its own resources. Create new lanes, bays, or tables for the new location and assign them to your packages. |
| Payment | Connect and test a payment processor for the cloned venue before going live — payment settings aren't copied. |
| Third-party integrations | Reconnect any integrations the new venue uses, such as Tripleseat. |
Set up payments
A new venue starts with payments in Test Mode, so it can't charge real bookings yet. Find the Payment card in the right panel of the venue detail page and click Settings to connect a processor — we recommend Stripe. See the payment processor article for the full setup.
Updated Jun 15, 2026
Was this helpful?