
Discount codes (promo codes)
Discount codes (promo codes) take money off a booking. You build them under Promote, choose which packages and add-ons each code covers, set the rules for when and how often it works, then share the code, put it in a link, or give it to a membership plan as a perk.
Discount types
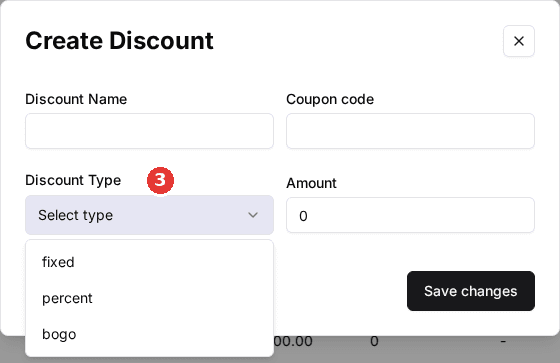
The Discount Type dropdown has three options. percent takes a percentage off (20% off a $100 package saves $20). fixed takes a flat amount off, so a $15 code saves $15 whatever the booking size. bogo makes a second item free or cheaper when the guest books the item the code is assigned to.
Create a discount code
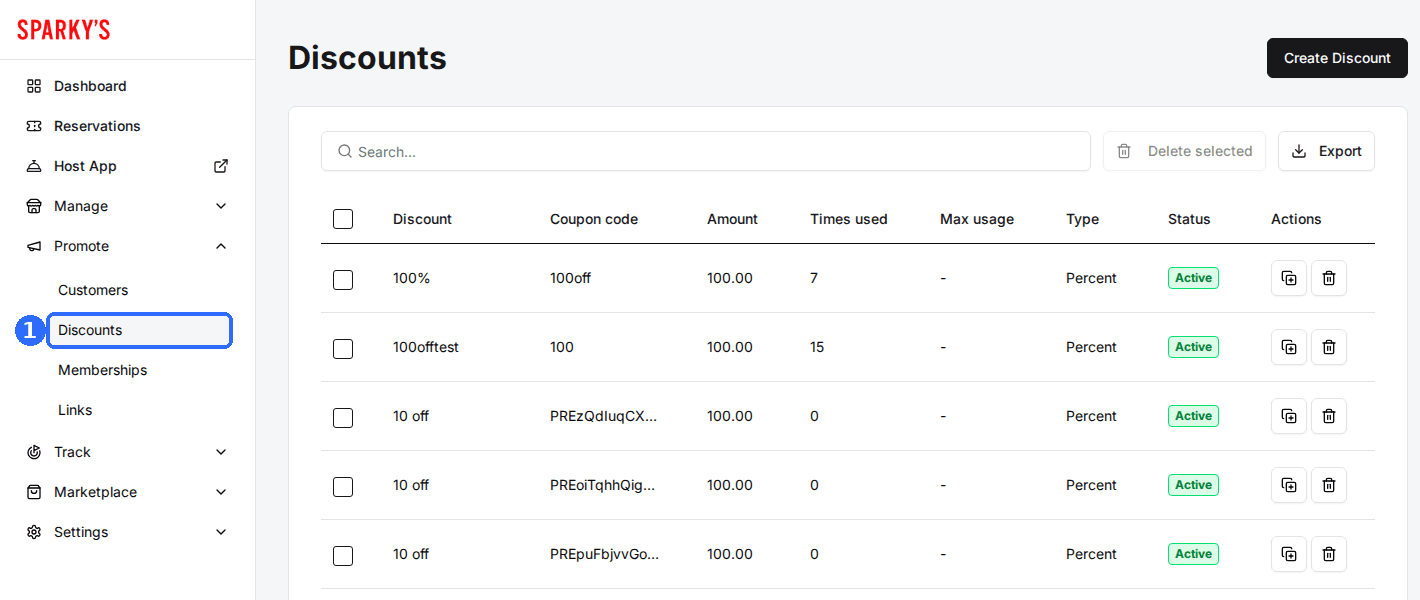
Navigate to Discounts
The list shows every code with its Times used, Max usage, Type and Status.
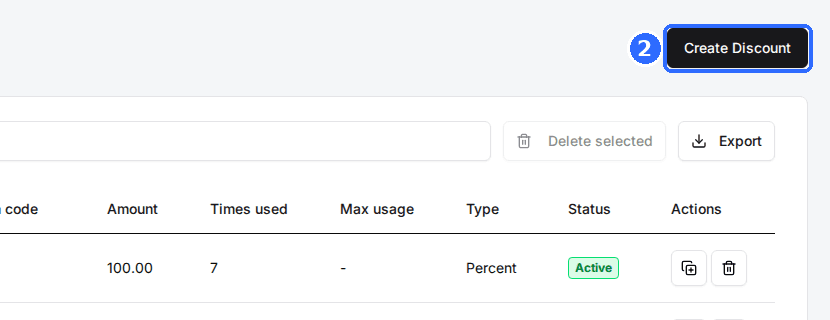
Click Create Discount
Create Discount is in the top-right corner. The Create Discount window opens.
Enter the discount details
Enter a Discount Name (required, shown in the admin list and reports), the Coupon code guests type, the Discount Type, and the Amount (dollars for fixed, percentage points for percent).
Save the discount
Click Save changes. Rex saves the coupon code in capitals and opens the discount's detail page, where every other setting lives.
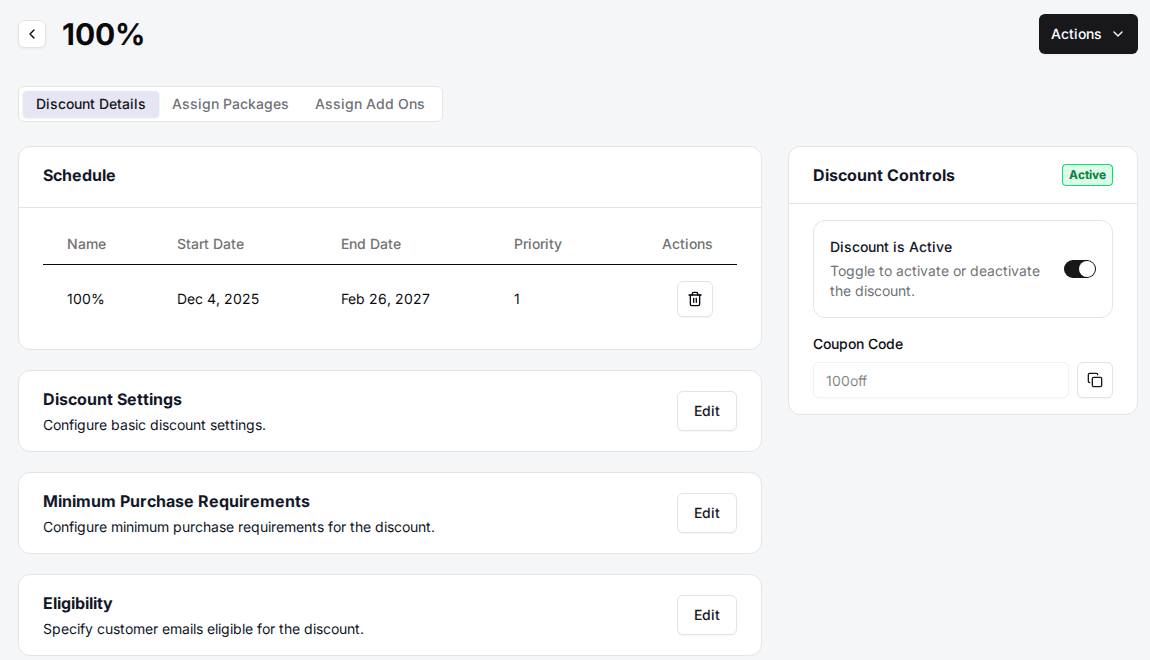
A new code is valid from the day you create it until the same date next year. Change that range on the Schedule card. Codes are not case sensitive: a guest typing 10off gets the same result as 10OFF.
Choose what the code applies to
A discount only works on what it is assigned to. A code with nothing ticked on its Assign Packages and Assign Add Ons tabs is refused on every booking, so assign it before you share it.
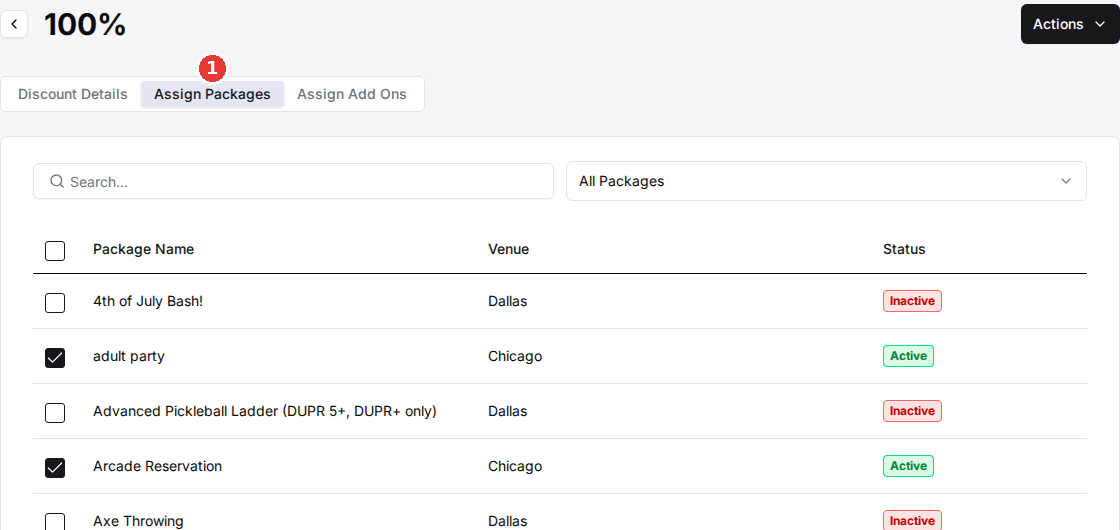
Open the Assign Packages tab
On the discount's detail page, click Assign Packages. The table lists every package at every venue, with a Status of Active for the ones this code covers.
Filter the list
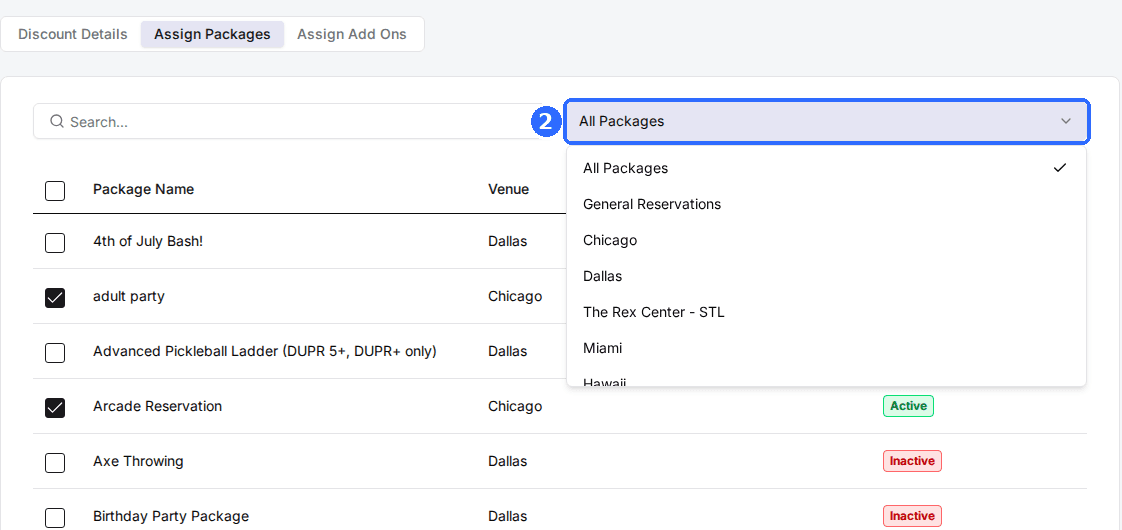
Use the filter dropdown: All Packages lists packages, General Reservations lists one row per venue for bookings made without a package, and each venue name narrows the list to that venue. Search finds a package by name.
Check the packages the code covers
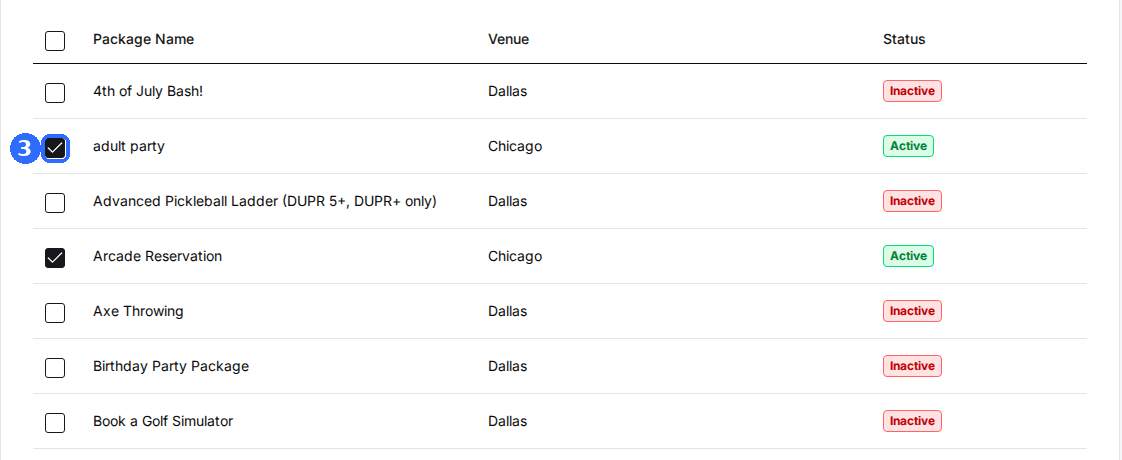
Tick each package (or General Reservations row). Each tick saves straight away, and unticking removes it. There is no Save button.
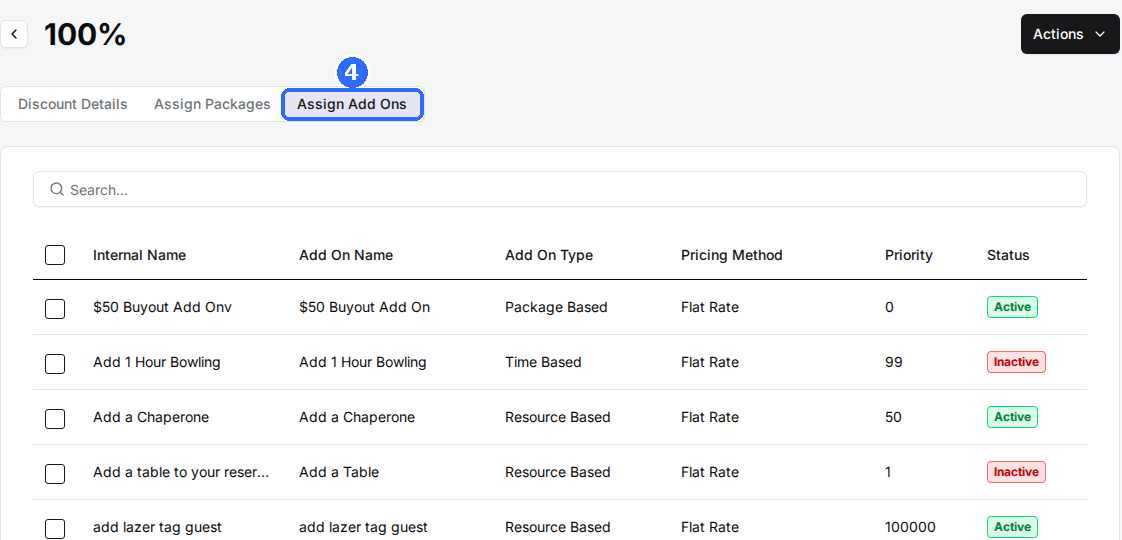
Open the Assign Add Ons tab
Tick the add-ons the code covers. These also save as you tick.
How Rex decides whether a code is accepted:
- On a package booking, the code is accepted when that package is ticked, or when the cart holds an add-on that is ticked.
- On a booking made without a package, the code is accepted when any row at that venue is ticked: its General Reservations row or any of its packages.
- A percent code takes its percentage off the package price only when the package is ticked, and off an add-on only when that add-on is ticked. A fixed code, once accepted, comes off the package price first and any remainder carries onto the add-ons.
A package created after the discount is not added to it. When you add a package, tick it on every discount that should cover it.
Discount settings
The Discount Details tab holds the Schedule card, the Discount Settings card and two more cards: Minimum Purchase Requirements and Eligibility. A BOGO Configuration card appears when the type is bogo. On the right, the Discount is Active toggle pauses a code without deleting it. Click Edit on Discount Settings for these fields:
| Field | Description |
|---|---|
| Discount Name | Your internal label, shown in the admin list and reports. |
| Coupon Code | What guests type at checkout. |
| Discount Type | fixed, percent or bogo. |
| Amount | Dollars off for fixed, percentage off for percent. Hidden for bogo, which is set on the BOGO Configuration card. |
| Max Usage Limit | How many times the code can be redeemed inside the Max Usage Interval. 0 for unlimited. |
| Max Usage Interval | The window the limit counts over: All Time, Rolling 24 Hours, Rolling 7 Days, Rolling 30 Days or Rolling 365 Days. |
| Usage Resets On | Shown when Is Per Person is on. Rolling Window, or Membership Billing Cycle to reset each member's allowance with their billing period. |
| Applied Only For Durations | Limit the code to specific booking lengths. Leave empty for any length. |
| Is Per Person | Count the limit separately for each guest's email address instead of across everyone. |
| Max Usage Duration (Minutes) | A running total of booked minutes the code can discount for a guest. 0 for unlimited. |
| Max Discountable Lanes | Discount only this many lanes' worth of a per-lane price. Blank for no cap. |
| Max Discountable Minutes | Discount only this many minutes' worth of a time-based price. Blank for no cap. |
| Apply to Fees | Also take the discount off the booking's service fee. The fee never goes below zero. |
The other cards
- BOGO Configuration: set the Discounted Item Type (Package or Add On), pick the Discounted Package or Discounted Add On, and choose the Discount Type for it: Free (100% Off), Percent Off or Fixed Amount Off. The code is refused unless that item is in the booking.
- Minimum Purchase Requirements: turn on Apply Minimum Purchase Requirement and set a Minimum Purchase Amount ($). The booking subtotal must reach it before the code is accepted.
- Eligibility: turn on Restrict to specific emails and list the addresses in Emails. Only guests booking with one of them can use the code.
How usage limits work
Max Usage Limit and Max Usage Interval work together. Rex counts the redemptions inside the interval, counting back from the moment a guest applies the code, and refuses the code once the limit is reached. Limit 5 with Rolling 30 Days allows five redemptions in any 30 days. Limit 100 with All Time is a lifetime cap of 100. With Is Per Person on, the count is per guest email.
Usage Resets On set to Membership Billing Cycle lines the window up with the member's current billing period on a plan that grants this discount, so a monthly member's allowance refills on their renewal date. A guest with no active membership on such a plan falls back to the rolling window.
To give a fixed number of bookings, such as 10 visits at 50% off, set Max Usage Limit to 10, leave Max Usage Interval on All Time and turn Is Per Person on. A redemption is counted when the booking is made, and the Times used column updates straight away.
Schedule when a discount is valid
Open the schedule
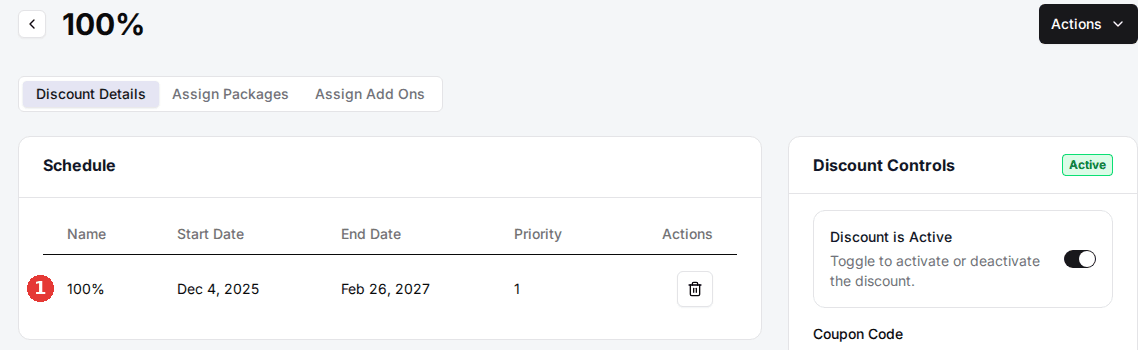
On the Discount Details tab, click the row on the Schedule card. The Edit Schedule window opens.
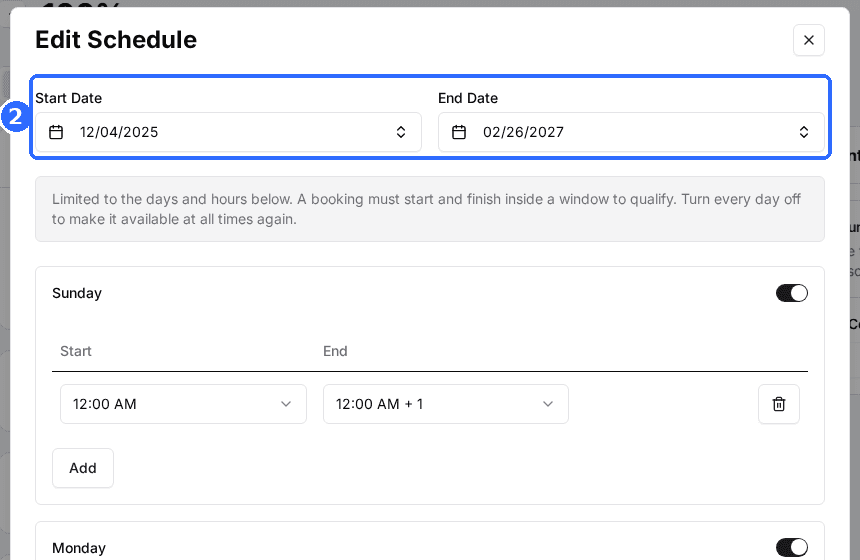
Set the Start Date and End Date
Both dates are required. The range is checked against the date the guest is booking for, not the day they book.
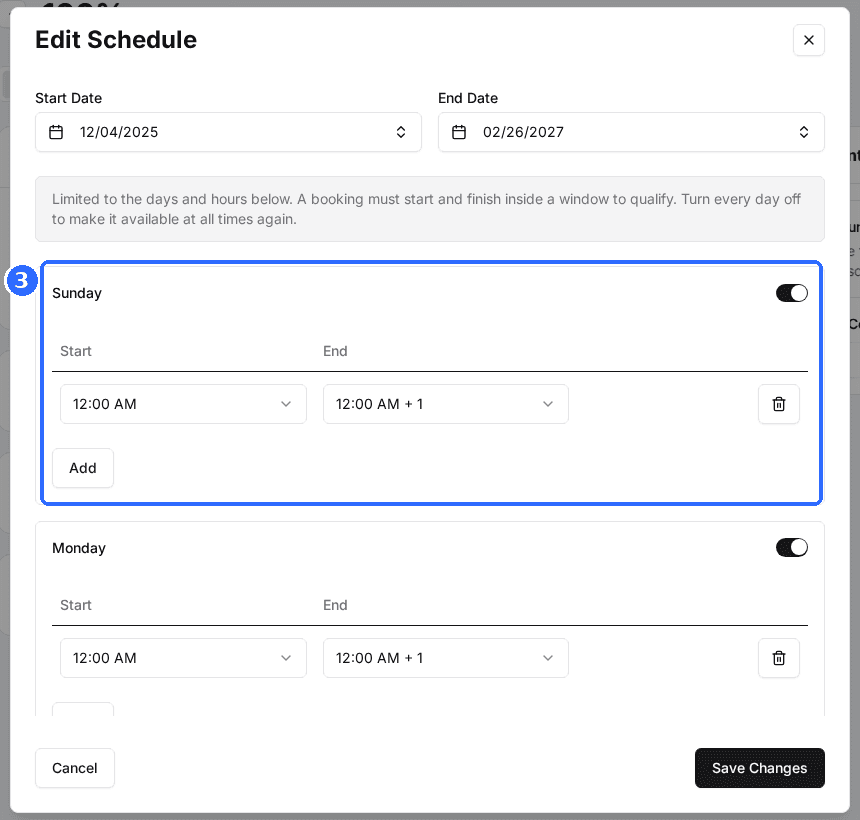
Turn on the days and set the hours
With every day off, the code works at any time inside the date range. Turn a day on to limit it: Rex adds a full-day window, which you narrow with Start and End. Click Add for a second window on the same day, or the trash icon to remove one.
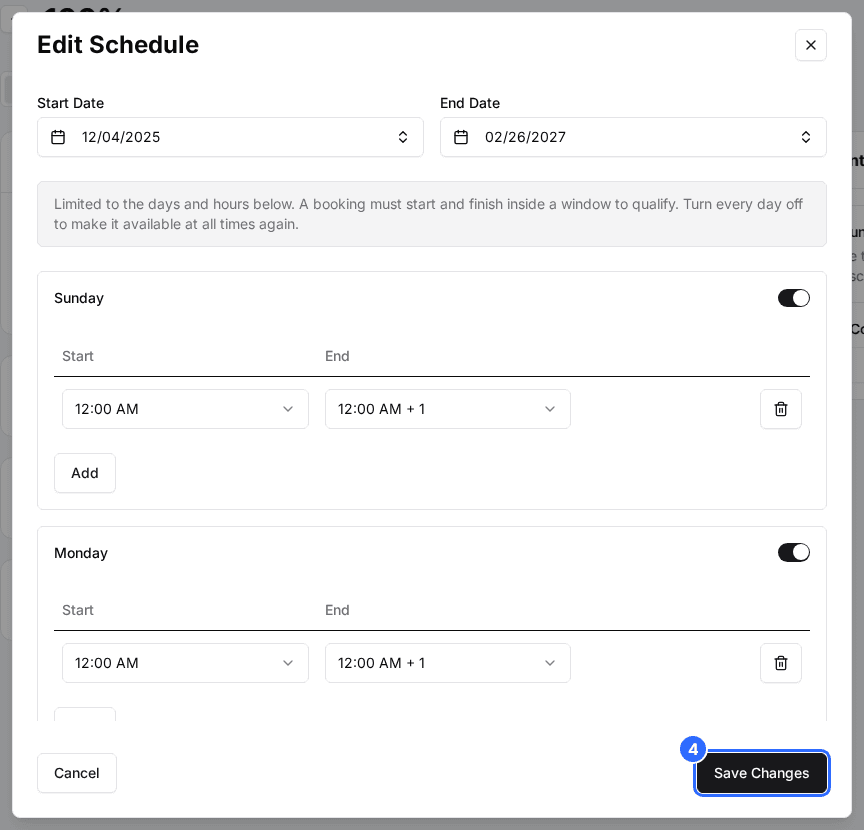
Save the schedule
Click Save Changes. The Schedule card shows the new start and end dates.
A booking qualifies only when it starts and finishes inside a window for that weekday. With a window ending at noon, an 11:30 to 12:30 booking is refused, while 8:00 to 8:30 gets the discount. Each day keeps its own hours, so when you widen them, change every day you mean to cover.
Use more than one code on a booking
A guest can apply several codes to one booking and the savings add together. To allow only one, open the package's Package Settings card (Manage > Venues > your venue > Packages > the package) and turn on Allow Only One Discount Per Reservation. A second code is then refused with the message that only one discount code can be applied per reservation.
Hand out unique codes in bulk
To give many people their own code, clone a discount that has the settings you want: click the clone icon on its row in the list, or Actions > Clone discount on its detail page. In the Clone Discount window enter a Discount Name, an optional Prefix (up to 3 characters) and the Number of codes (1 to 999), then click Clone. Each copy gets a random code and keeps the original's amount, rules, schedule, package and add-on assignments and membership plan links, with Times used starting at 0.
Manage and report on codes
- Search the list by name or code, and click a column header to sort.
- Click a row to open the discount. The trash icon on a row deletes that code after you confirm Delete Discount.
- Tick several rows and click Delete selected to remove them together.
- Export downloads the list as a CSV, filtered by the current search.
- For results over a date range, go to Track > Reports, click Export and choose Discount Codes. That file adds Times Used, Unique Customers, Total Discount Given, Total Revenue and Avg Order Value per code.
How guests apply a code
At checkout, guests type the code into the Enter Promo Code field and press Enter or the arrow button. When the venue also sells gift cards, the field sits under a Promo Code tab next to a Gift Card tab. A refused code shows an error under the field without saying which rule failed.
The field only appears at venues with Discounts Enabled turned on in the Venue Controls card (Manage > Venues > your venue). To apply a code for the guest, pick it in the Discount field of a link under Promote > Links. The link adds ?code= to the address and Rex applies the code when the guest confirms their details. See Create booking links.
Give a discount to members
Open a plan under Promote > Memberships and tick the discount in its Benefits card. Signed-in members of that plan get it applied automatically when the discount is assigned to the package they book. The perk still follows every rule above: schedule, usage limit and package assignment. See Memberships.
If a code stops working, Why is my discount code not working? walks through each check in order.
Updated Oct 8, 2026
Was this helpful?