
Sell memberships
Memberships let you sell recurring or one-time plans through Stripe. Members sign up on your memberships page, pay through Stripe Checkout, and get whatever you attach to their plan: discounts, members-only packages and add-ons.
Memberships use a Stripe account connected for your whole account under Promote > Memberships. It is separate from the payment connection each venue uses for bookings.
Connect Stripe
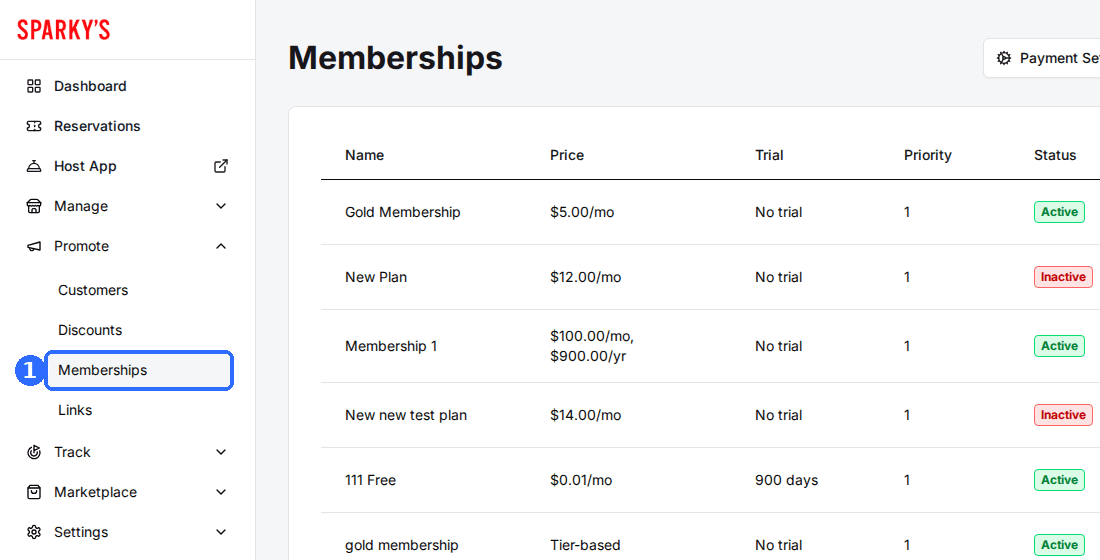
Navigate to Memberships
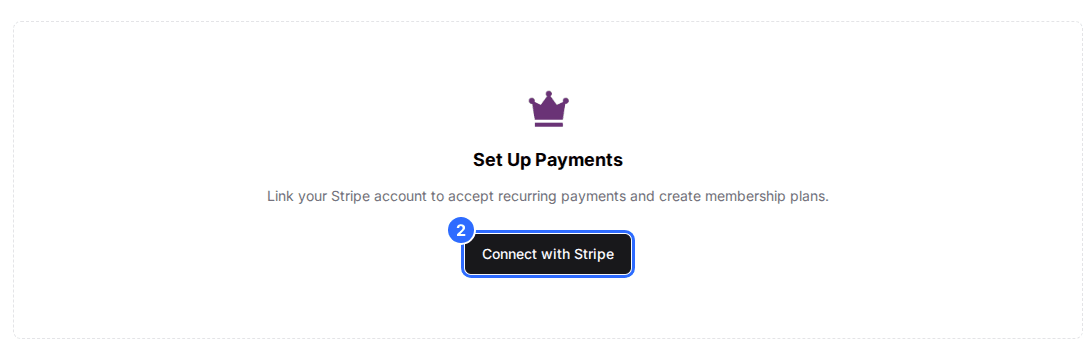
If no Stripe account is connected yet, the page shows Set Up Payments with a Connect with Stripe button.
Click Connect with Stripe
Log in to your Stripe account, or create one, and authorize Rex. Back in Rex, the Create Plan button appears.
Verify the connection
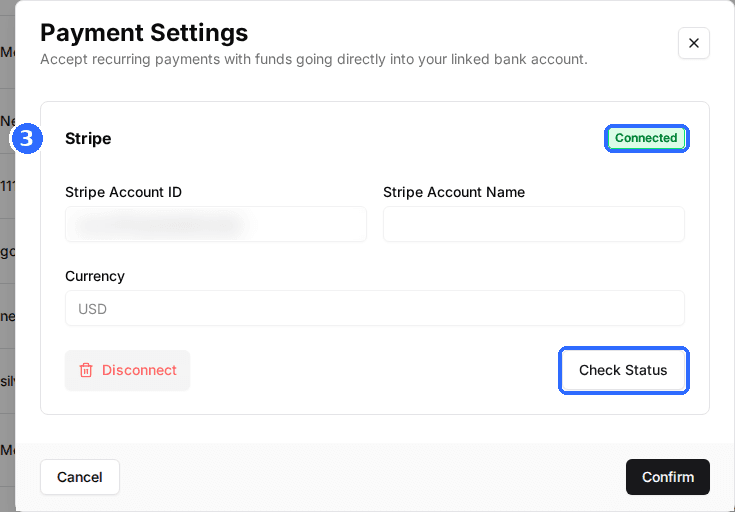
Click Payment Settings. The Stripe card shows Connected, Pending or Not Connected, with the Stripe Account ID, Stripe Account Name and Currency. Click Check Status to refresh it.
Create a membership plan
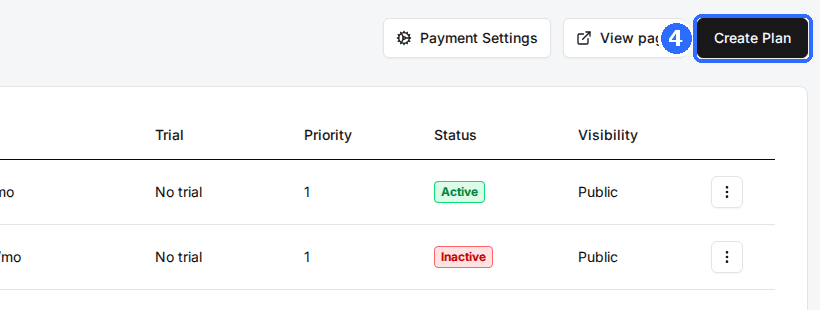
Click Create Plan
Create Plan is in the top-right corner of the Memberships page. The Create Plan window opens.
Enter the plan details
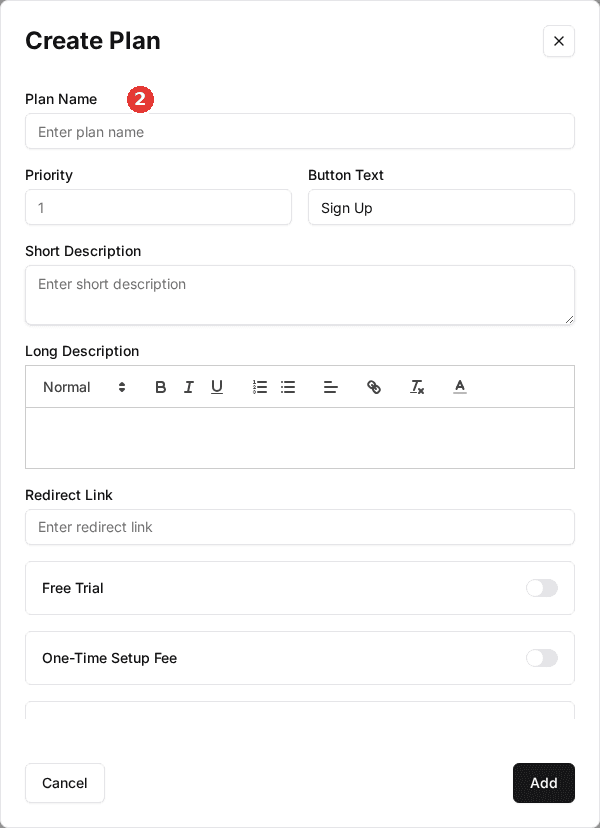
Enter the Plan Name (required). Priority sets the order on your memberships page, highest number first. Button Text defaults to Sign Up. Add a Short Description for the plan card, a Long Description for the full details, and an optional Redirect Link for where guests go after signing up.
Set the rates
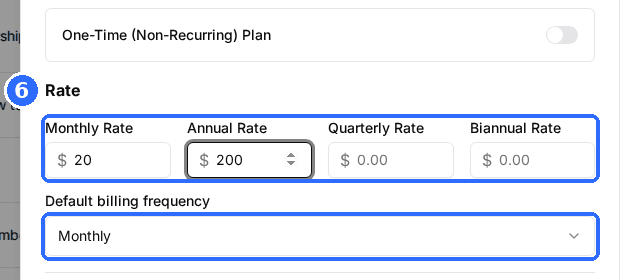
Fill in any of Monthly Rate, Quarterly Rate, Biannual Rate and Annual Rate. With more than one, pick the Default billing frequency guests see first. For a plan that is paid once, turn on One-Time (Non-Recurring) Plan and enter a One-Time Price, plus an optional Expiration Date after which it can no longer be bought.
Add member tiers (optional)
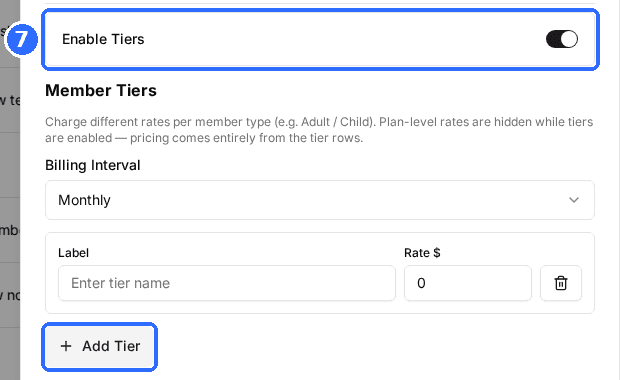
Turn on Enable Tiers to price one plan by member type, such as Adult and Child. Choose the Billing Interval, then click Add Tier for each tier and enter its Label and Rate $.
Add a free trial or setup fee (optional)
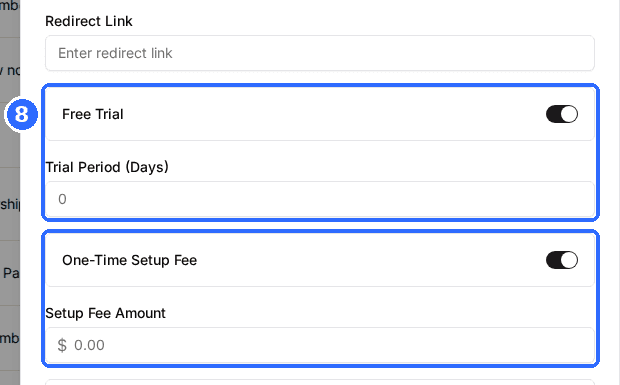
Turn on Free Trial and enter the Trial Period (Days) before the first charge. Trials are not available on one-time plans. Turn on One-Time Setup Fee and enter a Setup Fee Amount to charge once at signup.
Choose categories, waiver and taxes (optional)
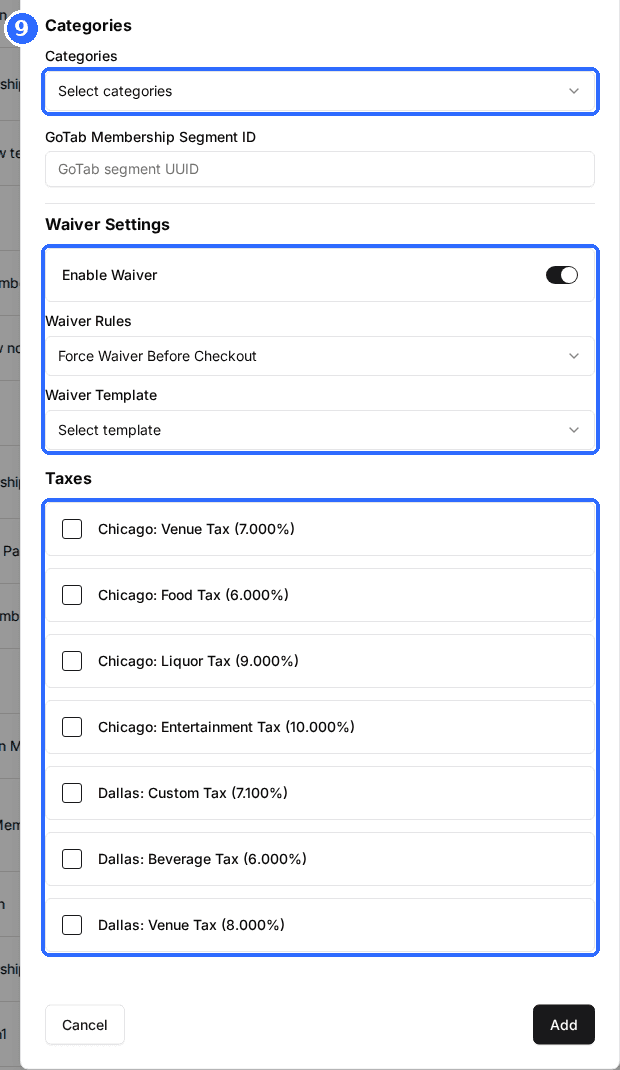
Pick Categories to group plans for guests. Under Waiver Settings, turn on Enable Waiver and choose the Waiver Rules and Waiver Template. Under Taxes, tick the taxes to charge; they come from each venue's Taxes settings.
Click Add
The plan appears in the list, active and public.
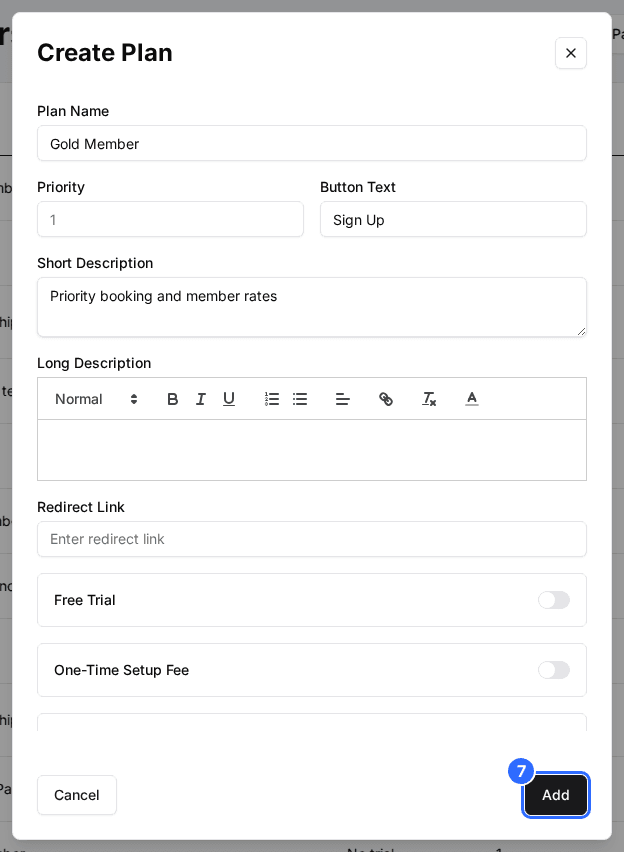
Rates, the setup fee and the one-time price cannot be changed after the plan is created. To charge a different price, create a new plan.
Manage a plan
Click a plan in the list to open it. Each card on the left has an Edit button. The row menu in the list also has Copy link and Delete.
| Field | Description |
|---|---|
| Plan Details | The name, descriptions, priority, button text and redirect link from the Create Plan window. |
| Categories | The categories this plan is listed under on your memberships page. |
| Waiver Settings | Enable Waiver, with Waiver Rules of Force Waiver Before Checkout or Waiver Optional, and the Waiver Template. |
| Revenue split | Shown once you have payout recipients. The share of this plan's revenue each recipient gets; the membership account keeps the rest. |
| Member Questions | Shown on tiered plans. Checkout questions guests answer for each member. |
| Benefits | Tick the discounts members of this plan receive. Each tick saves straight away. |
| Plan Controls | Plan is Active, the Stripe Plan ID, the Membership Link with a copy button, and Visibility: Public (listed on your memberships page) or Hidden (reachable only by its link). |
| Plan Thumbnail | Click Upload Image to set the picture on the plan card. |
Benefits lists the codes you built under Promote > Discounts. A member gets the discount automatically when they are signed in and the discount is assigned to the package they book. See Discount codes.
Pay coaches or vendors a share
The Payout recipients section below the plans list is for coaches or vendors who receive part of your membership revenue. Enter their email and click Add recipient. They get an email invite to connect their own Stripe account, and show as Pending until they do, then Connected. The row menu has Resend invite and Remove. Once a recipient is connected, open a plan's Revenue split card, click Add recipient, pick them and enter their percentage.
Share your memberships page
Active, public plans appear on your booking site at /memberships, on your custom domain if you have one. Click View page on the Memberships page to open it. To send guests straight to one plan, copy its Membership Link from Plan Controls. That is also how guests reach a Hidden plan.
Sell members-only packages
Open a package (Manage > Venues > your venue > Packages), click Edit on its Membership Settings card, turn on Member Only Package and choose the plans whose members may book it. Guests who are not signed-in members of those plans see a Members Sign In button on the package instead of the booking control. Add-ons have the same option: Member Only Addon on the add-on's Membership Settings card.
Move members over from another platform
Recreate each member's subscription in your Stripe account first: add them as a Stripe customer, create a subscription that starts on their usual billing date, and save their card or send a Stripe invoice. Create a matching plan in Rex, then link each member in the Host App.
Open the guest in the Host App
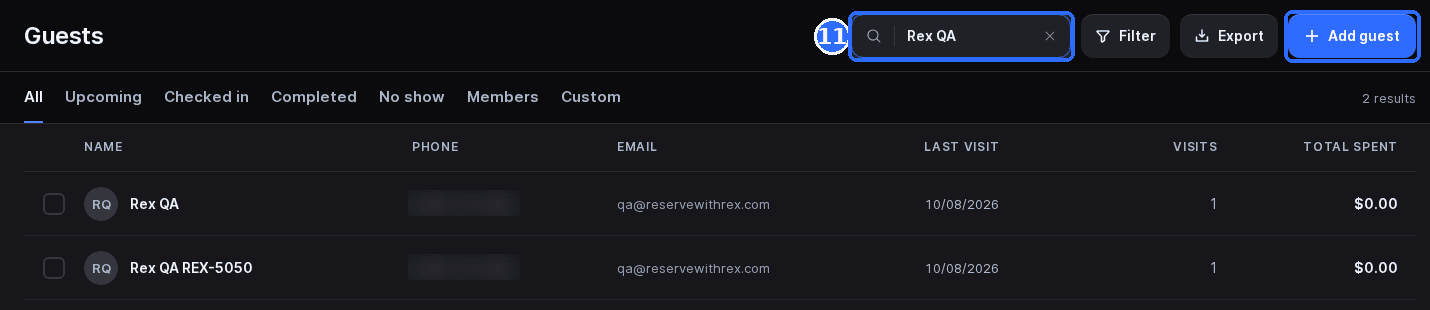
Search for the guest, or click Add guest to create them, and open their profile.
Click Add next to Membership
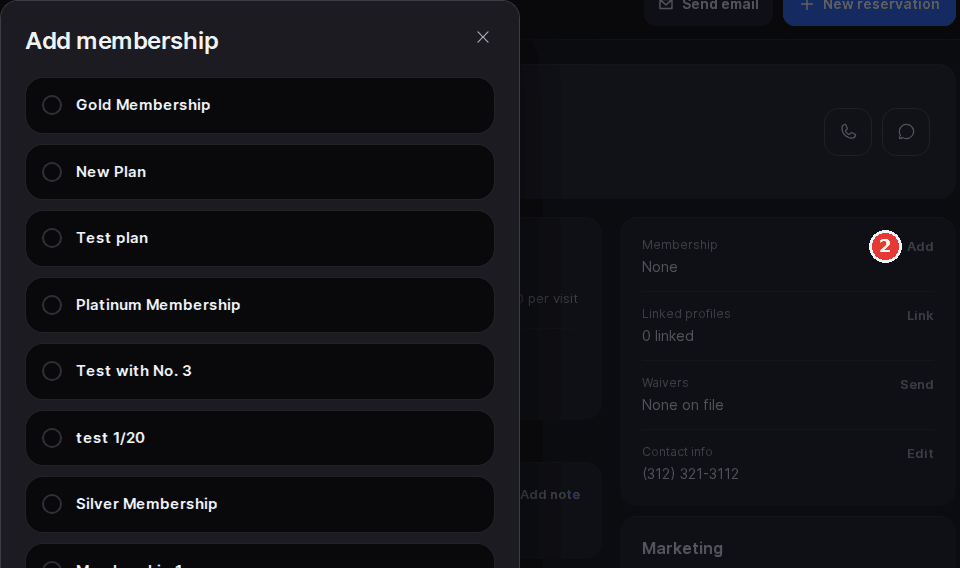
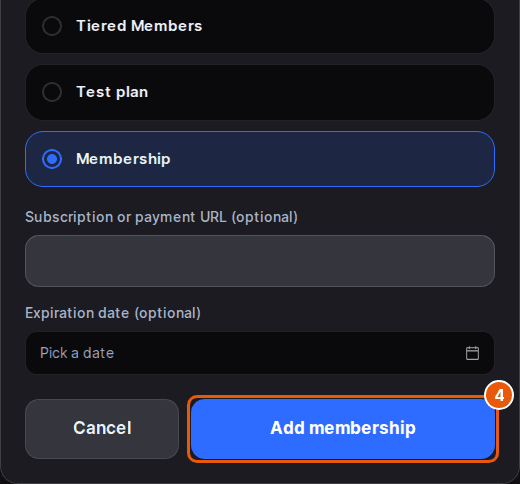
The Add membership window lists your plans. Select the plan.
Paste the Stripe link
Paste the Stripe subscription or payment URL into Subscription or payment URL (optional) so renewals keep running through Stripe. Leave it empty to add the membership without a payment and set an Expiration date instead.
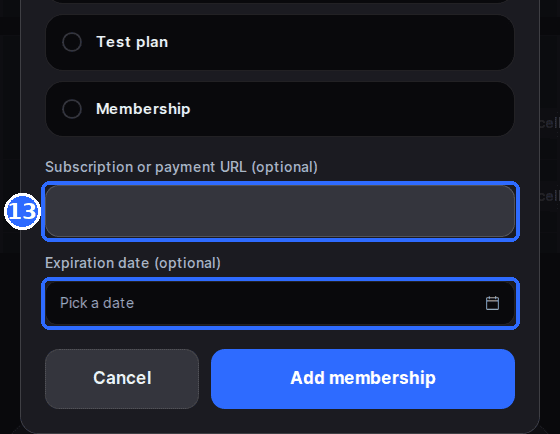
Click Add membership
The plan shows on the guest's profile. Make a test booking for them to check their discounts and members-only packages apply.
What guests see
The memberships page shows a toggle for the billing cycles you offer (Monthly, Quarterly, 6/mo. and Yearly) and filter chips for your plan categories. Each plan card shows the image, name, price and short description, with a From price on tiered plans. Guests click the plan's button (Sign Up unless you changed it), sign in or create an account, choose their members on a tiered plan, and pay in Stripe Checkout.
- Stripe charges recurring plans automatically each period. A free trial delays the first charge, and a setup fee is added to the first payment.
- Members see their plans under Memberships in their account, with a status and the Next Payment date, or Cancel date once cancelled.
- Manage opens the Stripe billing portal, where members update their card or cancel. A cancelled membership stays active until the end of the paid period. Memberships added in the Host App without a Stripe link have no Manage button.
Updated Oct 8, 2026
Was this helpful?