
Branding and design
Your booking page's branding (logos, banner, colors and page text) lives in Global Settings. Open Settings in the left menu of the admin dashboard, then click Global Settings.
Global Settings applies to your whole account, so every venue shares one booking page look. Only account-level admins see it; venue admins, regional admins and read-only users don't.
Upload your logos and banner
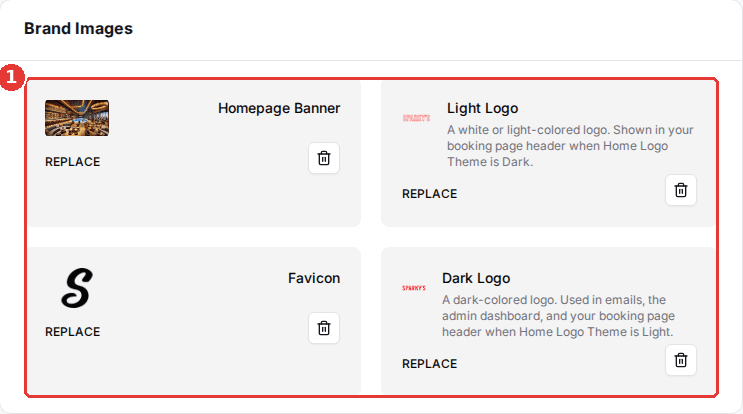
Click a tile in the Brand Images card
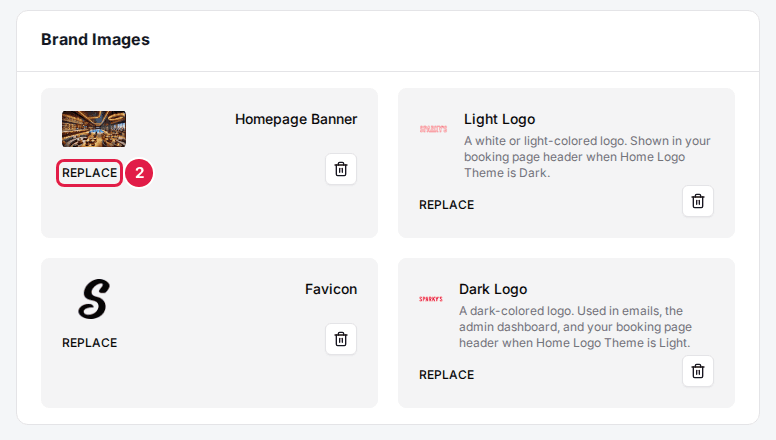
Click an empty tile, or the image (marked REPLACE) on a tile that already has one.
Choose your image file
Pick the file from your computer. It uploads and goes live as soon as it finishes; there's no save button. The trash icon on a tile removes its image.
| Field | Description |
|---|---|
| Homepage Banner | The background image of your booking page's home screen, where guests choose a location. Rex adds a dark overlay so the text on top stays readable. |
| Light Logo | A white or light-colored version of your logo, for dark backgrounds. Shown in the booking page header when Home Logo Theme is Dark. |
| Favicon | The small icon in the browser tab. Ideally the same favicon as your main website. |
| Dark Logo | A dark-colored version of your logo, for light backgrounds. Used in guest emails, the admin dashboard, and the booking page header when Home Logo Theme is Light. |
The two logo tiles are named after the logo's own color. The Home Logo Theme setting in Page Settings is named after your header's background instead: pick Dark for a dark header (it shows your Light Logo) or Light for a light header (it shows your Dark Logo). Rex doesn't switch logos automatically based on your colors.
Guest emails use your Dark Logo, or your Light Logo if you haven't uploaded a Dark Logo. To send the Light Logo instead, turn on Use Light Logo on Emails in the Global Settings panel on the right. Recommended sizes for each image are in Image sizes and formats.
Set your page colors
Each swatch in the Page Colors card opens a color picker where you can enter a hex code (for example #000000 for black). Colors save as you pick them and apply across the whole booking page.
| Field | Description |
|---|---|
| Body Background | The background behind the main content of the booking page. |
| Header | The background of the top navigation bar. |
| Footer | The background of the footer. |
| Main Button | The fill color of primary buttons, most importantly the booking button, and accents such as tag filters. |
| Progress Bar | The bar that shows guests how far through booking they are. |
| Header Text | Text in the header, such as nav links. |
| Footer Text | Text in the footer. |
| Main Button Text | Text inside primary buttons. |
| Floor Plan Accent | The highlight color on the floor plan where guests pick a spot. Uses your Main Button color until you set it. If the color would make names on the plan hard to read, Rex darkens it and shows a notice under the swatches. |
| Dark Mode | For a dark Body Background: switches the booking page to light text. |
If you don't know your brand hex codes, pick them off your website with a color picker tool or ask your designer. The booking page should feel like part of your main site.
Edit the page settings
Click Edit on the Page Settings card
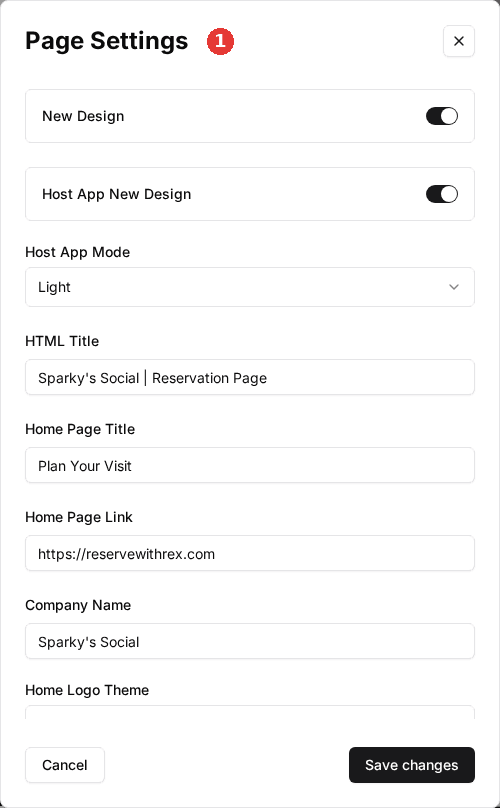
The Page Settings dialog opens. It holds the page text, the logo theme and a few design switches.
Enter your page text and choose your options
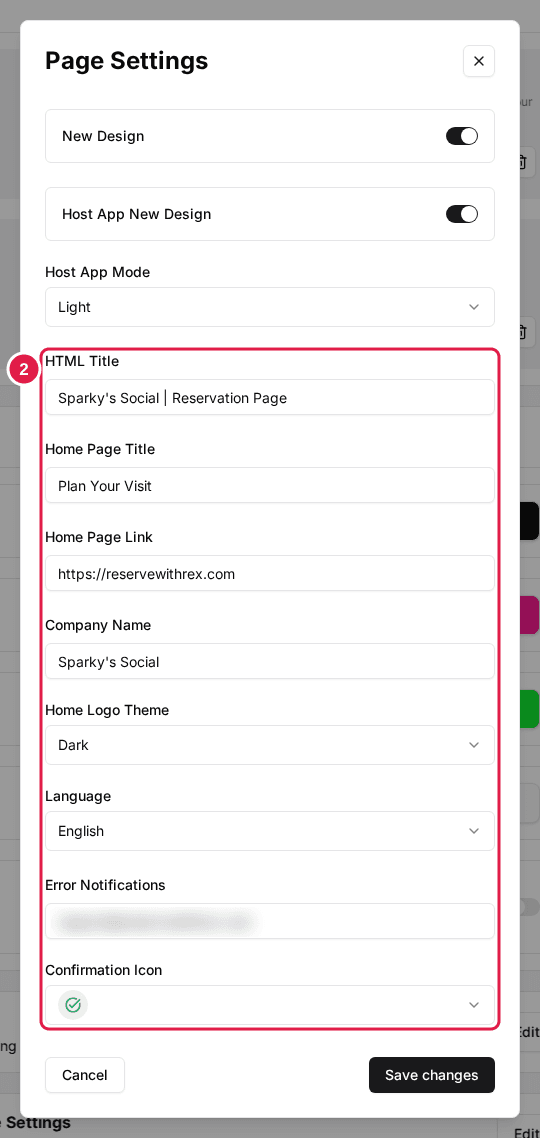
The fields are described below. Leave anything you don't need as it is.
Click Save changes
Your changes apply to the live booking page.
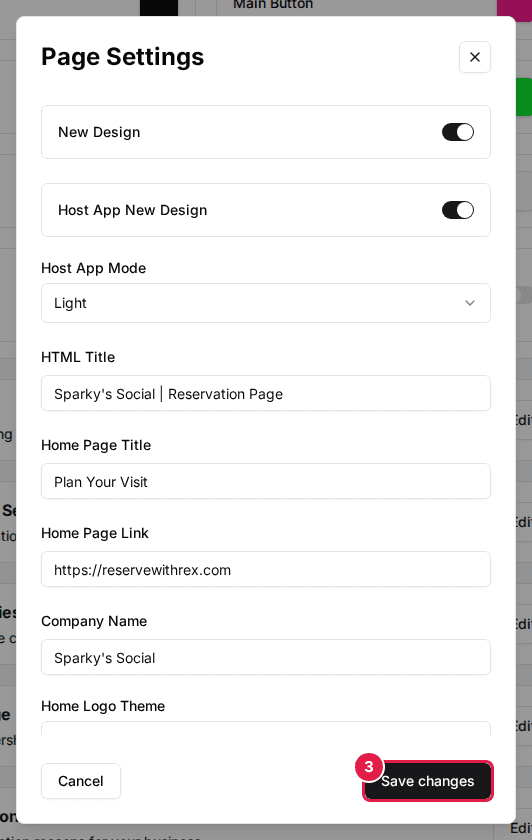
| Field | Description |
|---|---|
| Host App New Design | Switches staff to the new Host App design. |
| Host App Mode | The Host App's default theme, Dark or Light. |
| HTML Title | The page title shown in browser tabs and search results, for example your venue name plus "Reservations". |
| Home Page Title | The large heading at the top of your booking page, for example "Plan your visit". |
| Home Page Link | Where guests go when they click your logo. Usually your main website. |
| Company Name | Your business name, shown on the booking page and in guest emails. |
| Home Logo Theme | Dark shows your Light Logo in the header; Light shows your Dark Logo. Match it to your Header color. |
| Language | The language of your booking page: English or Icelandic. |
| Error Notifications | An email address that receives error alerts for your account. |
| Confirmation Icon | The icon guests see on the confirmation screen after booking, such as celebrate, thumbs up, ticket or bowling. |
Name your resources
Click Edit on the Reservation Page Settings card to change the words the booking page uses. Action Text is the word for your bookable resource (Bay, Court, Lane, Table and more, or type your own); it appears in pricing such as "per bay" and throughout booking. Party Title is the word for party and event bookings, used in the subject of party request emails. Click Save changes to apply.
Open your booking page in another tab and refresh it to check that everything looks right. For currency, date format and time slot defaults, see Global settings.
Updated Oct 9, 2026
Was this helpful?