
Collect signed waivers from guests
Rex collects signed waivers from guests as part of booking. Waivers are powered by DocuSeal: you build the waiver document in a DocuSeal editor inside Rex, then require it on the packages and membership plans that need it.
Waivers must be on your plan. If the Waivers page shows an upgrade prompt instead of your templates, contact Rex support to turn the feature on.
Create a waiver template
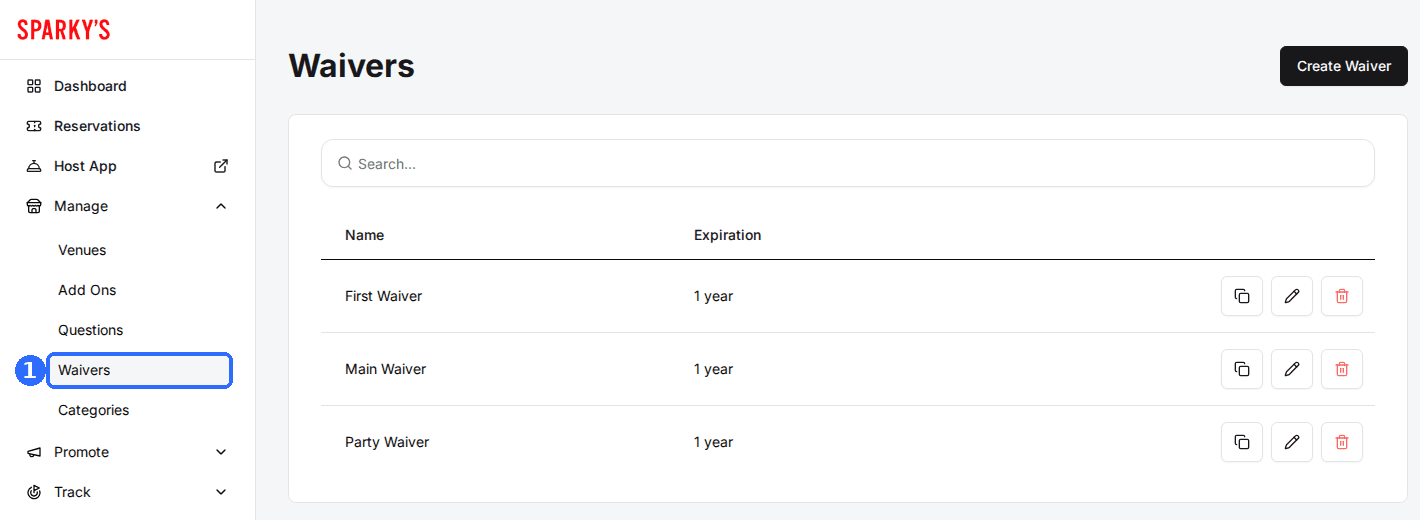
Navigate to Waivers
The list shows each template's Name and Expiration.
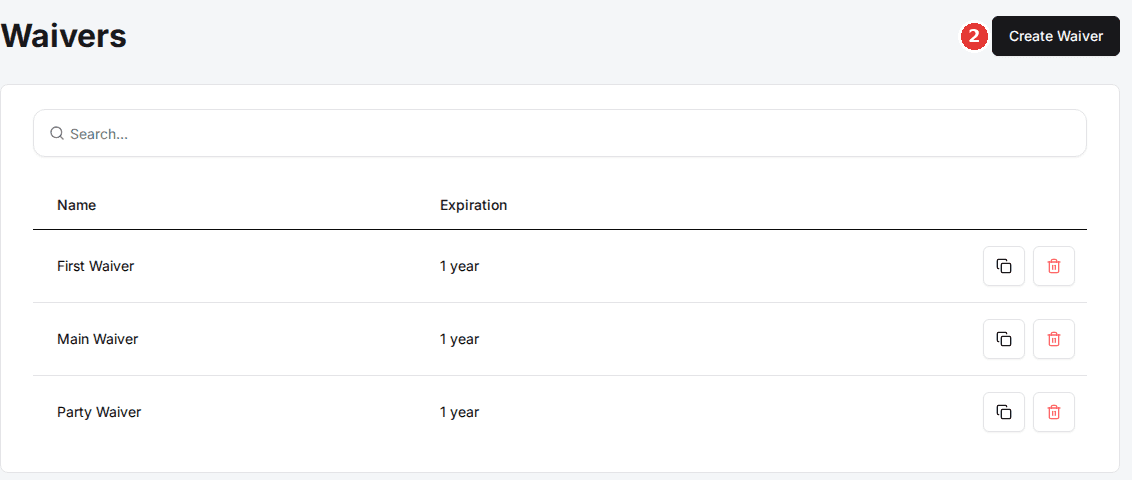
Click Create Waiver
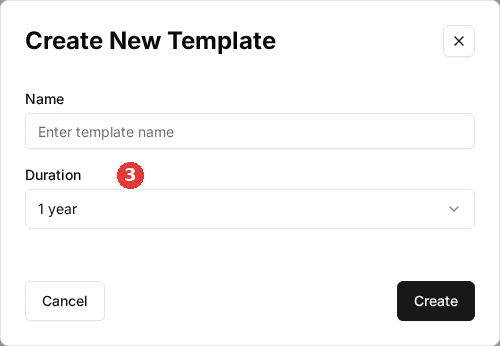
The Create New Template window opens.
Name the waiver and set a duration
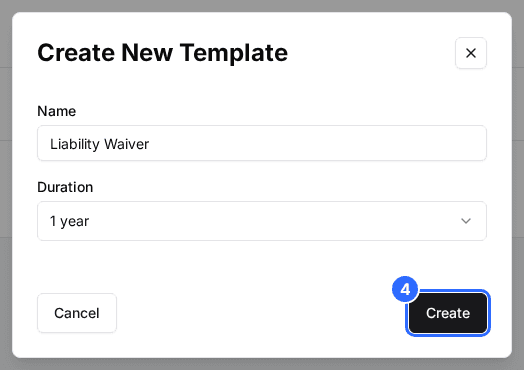
Enter a Name, such as Liability Waiver, and choose a Duration: how long a signature stays valid before the guest is asked to sign again. The options are 1 week, 1 month, 3 months, 6 months, 1 year (the default) and Never.
Click Create
The template appears in the list with its Expiration. Next, add the document itself in the editor.
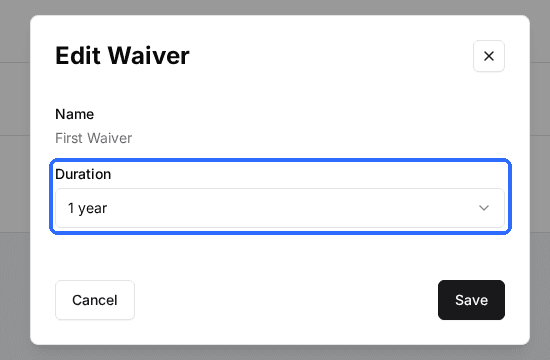
Once a guest signs, they aren't asked to sign the same waiver again until it expires. With a 1 year duration, a guest who signed three months ago books without signing again. To change a template's duration later, click the pencil icon on its row, pick a new Duration in the Edit Waiver window and click Save. Signatures already collected keep the expiry they were given.
Build the waiver content
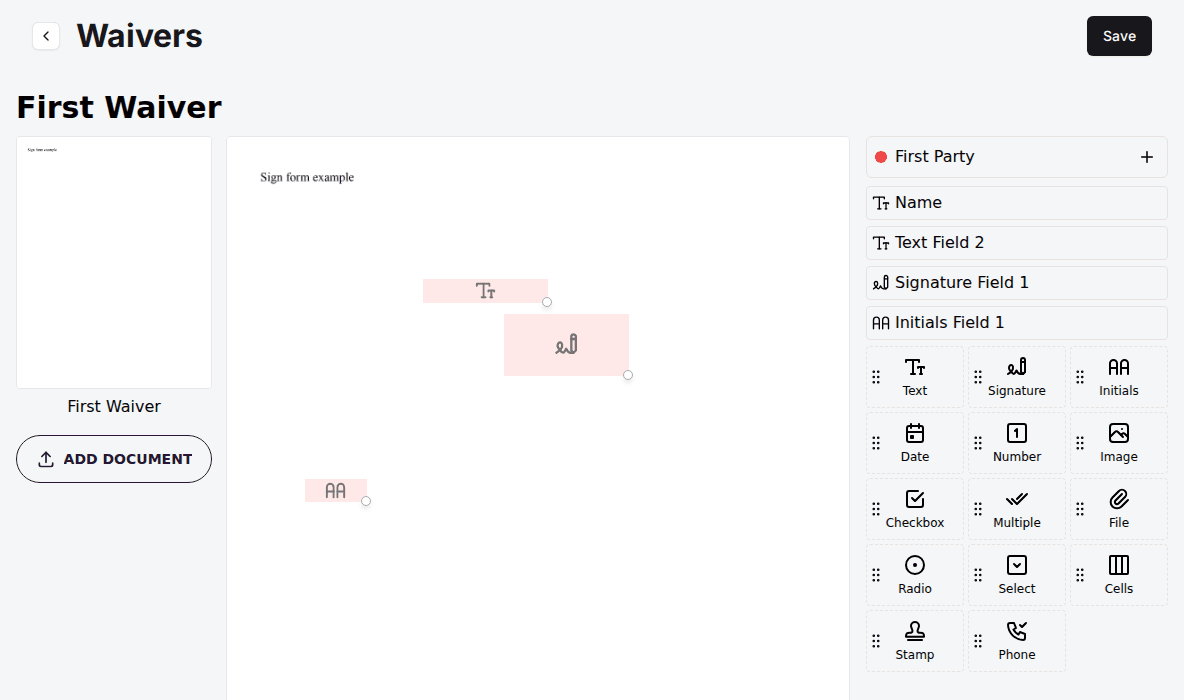
You build the waiver in the DocuSeal editor: upload a base document, usually a PDF of your liability waiver, then place the fields guests fill in.
Open the template
On the Waivers page, click the template's row. The DocuSeal editor opens.
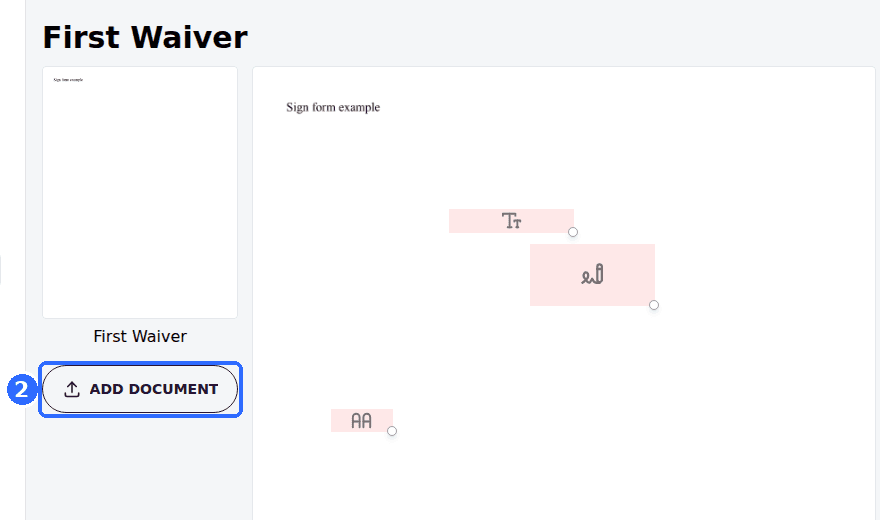
Upload your base document
Upload the document guests should sign. On its own it isn't fillable yet.
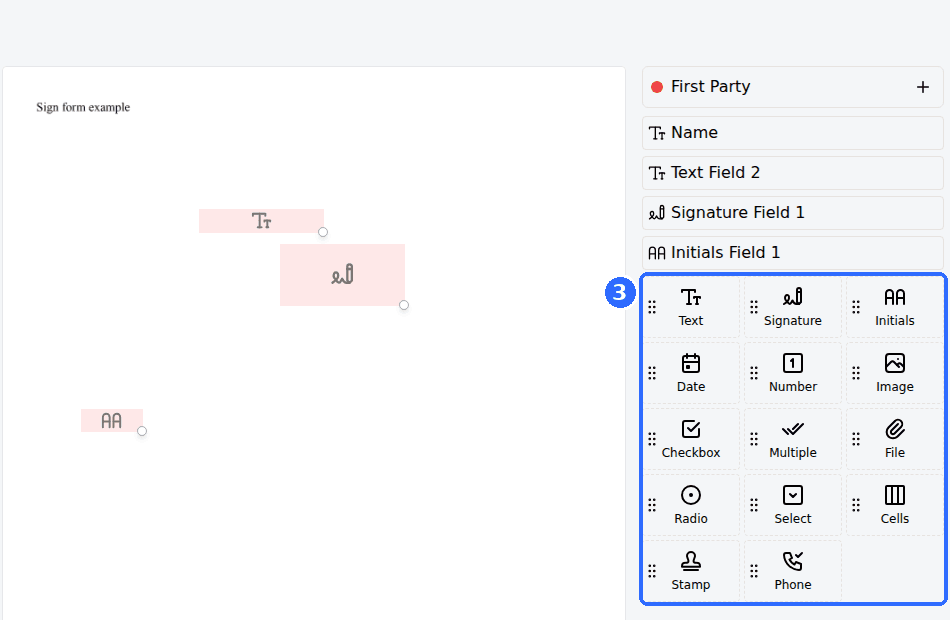
Add the fields guests fill in
Drag fields onto the document (signature, name, date, checkboxes) wherever guests need to fill something in.
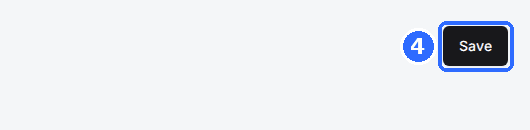
Save your changes
Click Save in the editor to return to your templates. Click a template again any time to change it.
For help laying out a document and configuring fields, see DocuSeal's help center.
Share and manage templates
Each row on the Waivers page has a copy icon, a pencil icon (change the duration) and a trash icon (delete the template). The copy icon offers three links:
| Field | Description |
|---|---|
| Copy waiver link | The standard shareable waiver link. |
| Copy waiver link with logout | Signs the current user out first, for shared or kiosk devices, so the next person signs as themselves. |
| Copy waiver link for guest | A link for guests who don't have an account. |
Share a link by email, text or a QR code so guests can sign ahead of time.
Require a waiver for a package
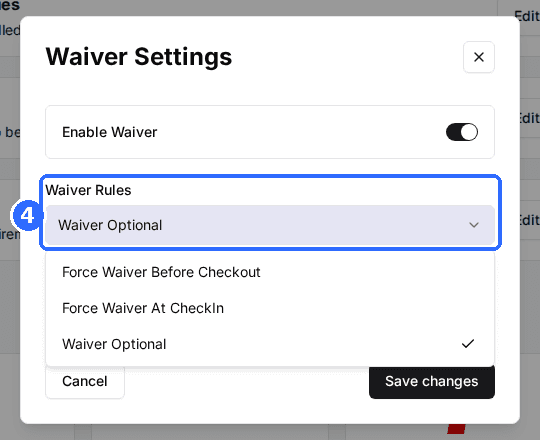
The Waiver Rules setting controls when the guest signs:
| Field | Description |
|---|---|
| Force Waiver Before Checkout | The guest must sign before they can pay and complete the booking. |
| Force Waiver At CheckIn | The guest isn't asked during online booking. The waiver is required at check-in instead. |
| Waiver Optional | The waiver is available but not required. |
Open the package
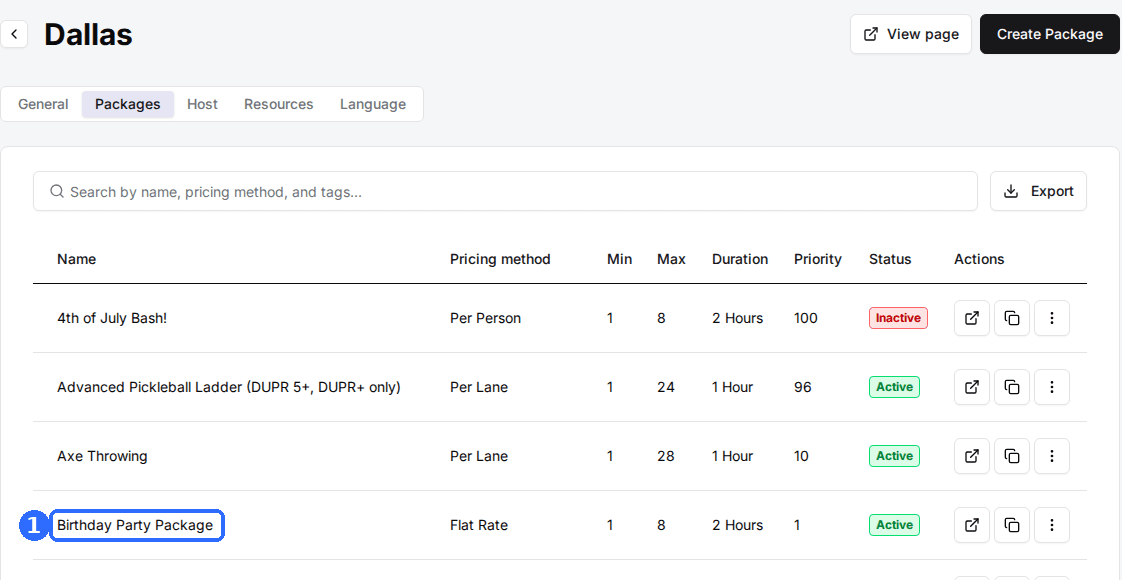
Open the venue, then its Packages tab, and click the package.
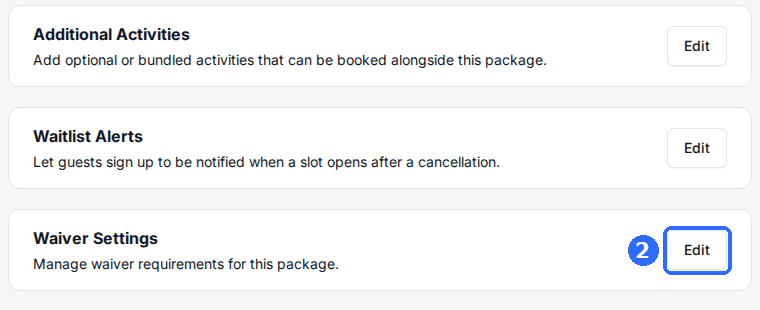
Edit Waiver Settings
Click Edit on the Waiver Settings card (Manage waiver requirements for this package).
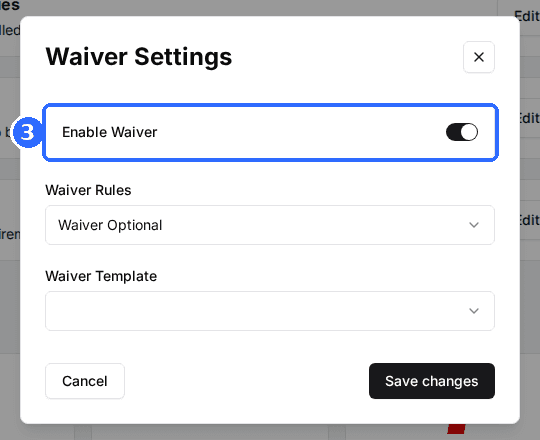
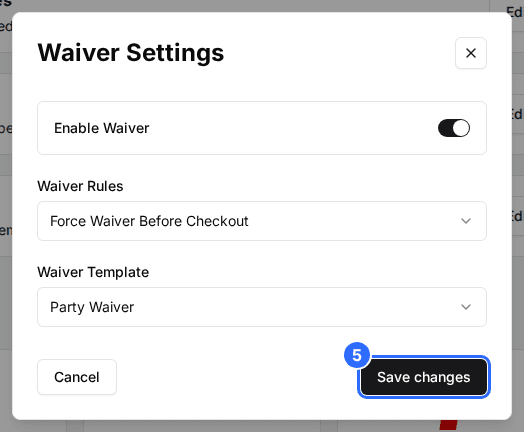
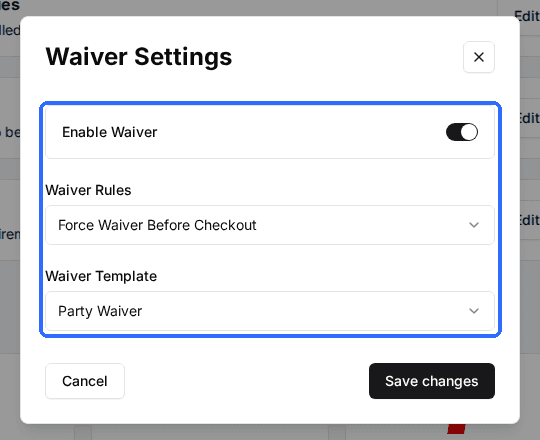
Turn on Enable Waiver
The Waiver Rules and Waiver Template fields appear.
Set the Waiver Rules and Waiver Template
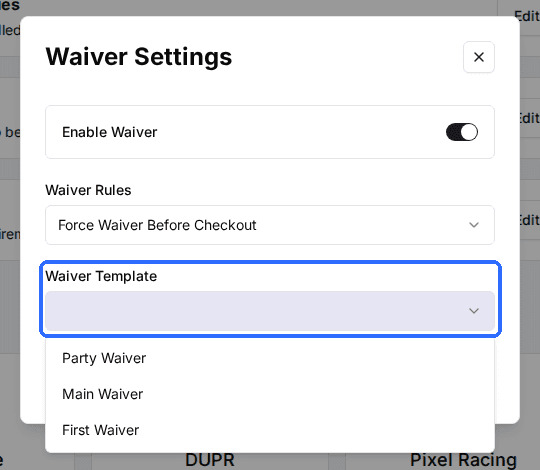
Choose when the guest signs and which template they sign. A template is required while Enable Waiver is on.
Save the package
Click Save changes.
Repeat for every package that needs a waiver. Different packages can use different templates and rules.
Require a waiver for a membership (optional)
Open the plan under Promote > Memberships and click Edit on its Waiver Settings card (the same section is in the Create Plan window). Turn on Enable Waiver, choose the Waiver Rules and Waiver Template, and save. Plans offer Force Waiver Before Checkout and Waiver Optional only, with no check-in option.
Get an email when a waiver is signed
Under Marketplace > Integrations, open the waiver integration and enter addresses in Waiver Notification Emails, separated by commas. Each time a guest signs, those addresses get an email with a link to the signed document.
What guests see
When a package is set to Force Waiver Before Checkout, the guest signs during booking, after confirming their details and before payment, then continues to pay.
- A guest who has already signed that waiver, and whose signature hasn't expired, skips the step.
- A guest can decline and go back to choose a different package.
Signing through a shared link
A guest who opens a shared waiver link signs in or creates an account first, unless you shared the guest version of the link. If your venue collects profile photos, they are asked to add one (they can skip it). The waiver then opens with their email filled in. After they submit, a banner confirms it is signed, and the signature counts for any package that uses that template until it expires.
After guests sign
Every signed waiver is stored with the guest. To find one later, from the Host App or from a reservation, see Find and view signed waivers.
Troubleshooting
The Waivers page shows an upgrade prompt
Possible causes
- •Waivers aren't on your plan.
Fix
Contact Rex support to turn on waivers.
Guests aren't asked to sign during booking
Possible causes
- •The package has no waiver turned on.
- •Its Waiver Rules is Force Waiver At CheckIn or Waiver Optional.
Fix
Open the package's Waiver Settings, turn on Enable Waiver, set Waiver Rules to Force Waiver Before Checkout and pick a template.
You can't save a package with waivers turned on
Possible causes
- •No Waiver Template is selected.
Fix
Pick a template. It is required while Enable Waiver is on.
A returning guest is asked to sign again
Possible causes
- •Their earlier signature has expired.
Fix
This follows the template's Duration. Lengthen it with the pencil icon on the Waivers page if signatures should last longer.
Updated Oct 8, 2026
Was this helpful?