
Create and configure a package
Packages are what guests book on your reservation page. Each one is a bookable experience with its own name, price, duration, and the resources it ties up. A bowling alley might sell a Bowling Reservation priced per lane per hour and a Birthday Party at a flat rate; each is its own package.
Set up your resources before you create packages. A package books against resource categories you've already built, so without them there's nothing for it to reserve.
New here? Start with Create your resources, then come back to build your first package.
Create the package
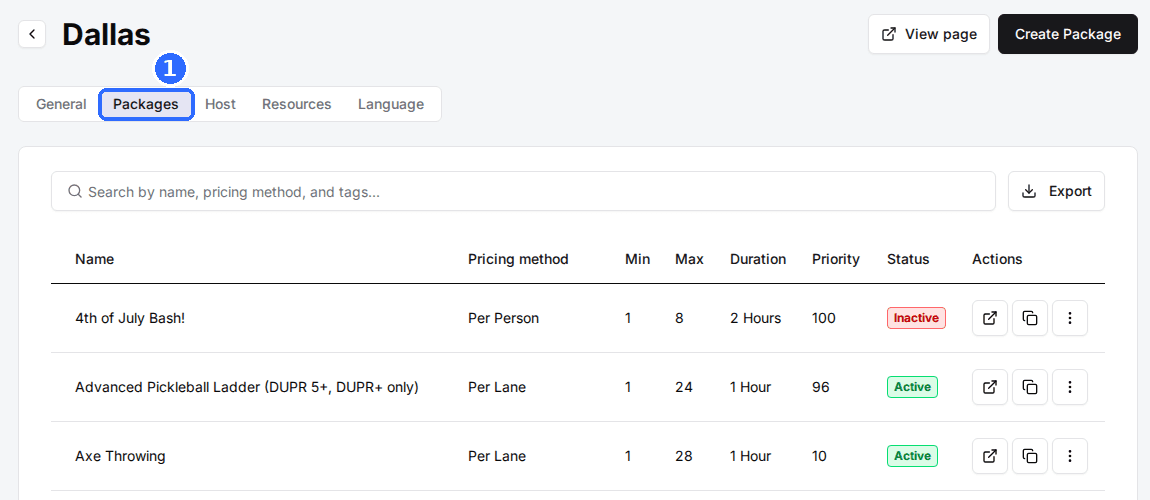
Navigate to your venue's packages
Click the venue you're configuring, then open its Packages tab.
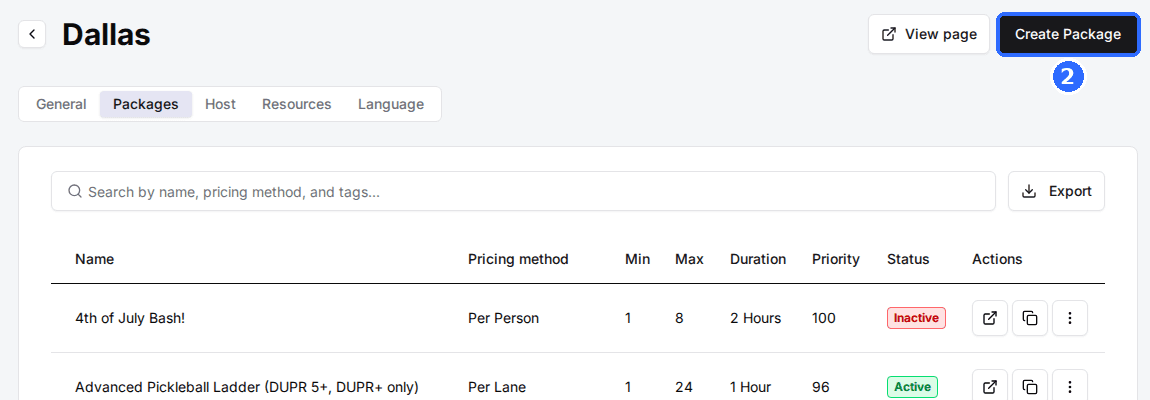
Click Create Package
The button is at the top right of the Packages tab. The Create a Package window opens.
Enter the package basics
Fill in the fields below, then click Save changes. The new package's page opens, with every other setting in its own card.
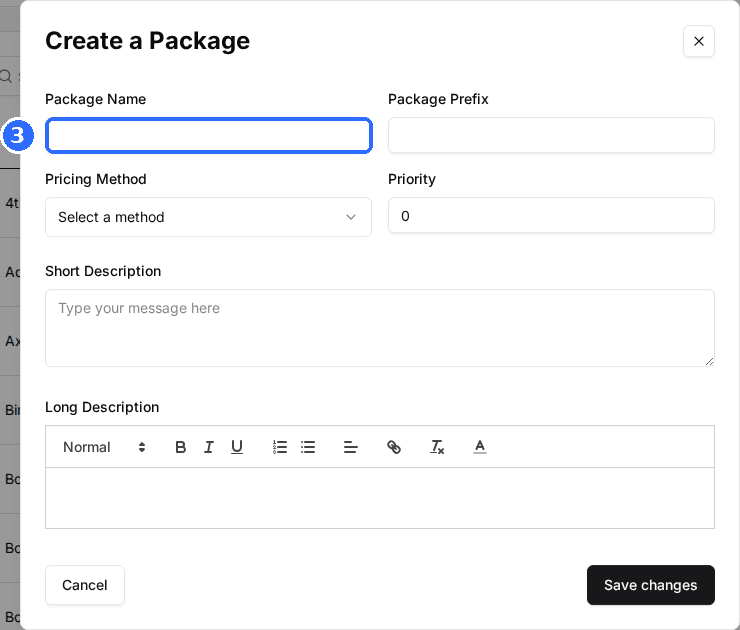
| Field | Description |
|---|---|
| Package Name | What guests see on the reservation page, up to 50 characters. Be specific: Bowling Reservation beats Reservation. |
| Package Prefix | A short code put in front of this package's reservation numbers (for example BWL-1042), so staff can tell bookings apart at a glance. |
| Pricing Method | How the rate on each time slot is charged: per lane, per person, per hour, a flat rate, or by age group. See Configure package pricing. |
| Priority | Where the package sits on your reservation page. Higher numbers show first. |
| Short Description | The line shown on the package card. |
| Long Description | Full details guests see when they open the package: what's included, fine print, restrictions. |
Set pricing, guests, and duration
Open Package Settings
Click Edit on the Package Settings card. Choose a Resource Allocation, confirm the Pricing Method, and set Minimum Guests, Maximum Guests, and the Deposit with its Deposit Type. Click Save changes.
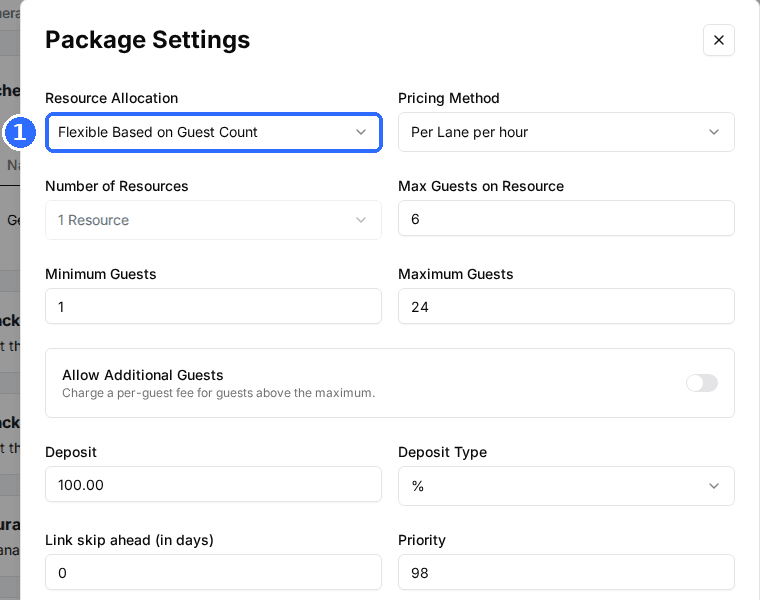
Resource Allocation decides how many resources each booking takes:
Flexible Based on Guest Count
RecommendedRex adds resources as the party grows, using Max Guests on Resource as the limit per resource.
Best for: Lanes, bays, and courts where one resource holds a small group and big parties need to split.
Fixed Number
Every booking takes the same Number of Resources, whatever the party size.
Best for: Private rooms and single-resource experiences.
Guest Chooses
Guests pick how many resources they want at checkout, from the Resource Options you enter.
Best for: When guests should decide, as in "how many lanes do you want?"
Flexible Based on Resource Capacity
Rex books the one resource, or resource combination, whose own capacity fits the party.
Best for: Rooms or tables of different sizes, where each resource already has its own capacity.
Set the duration
Click Edit on the Duration Settings card. Pick a Duration Mode, then set the buffers, Booking Cut Off, and How far in advance can guests book? Click Save changes.
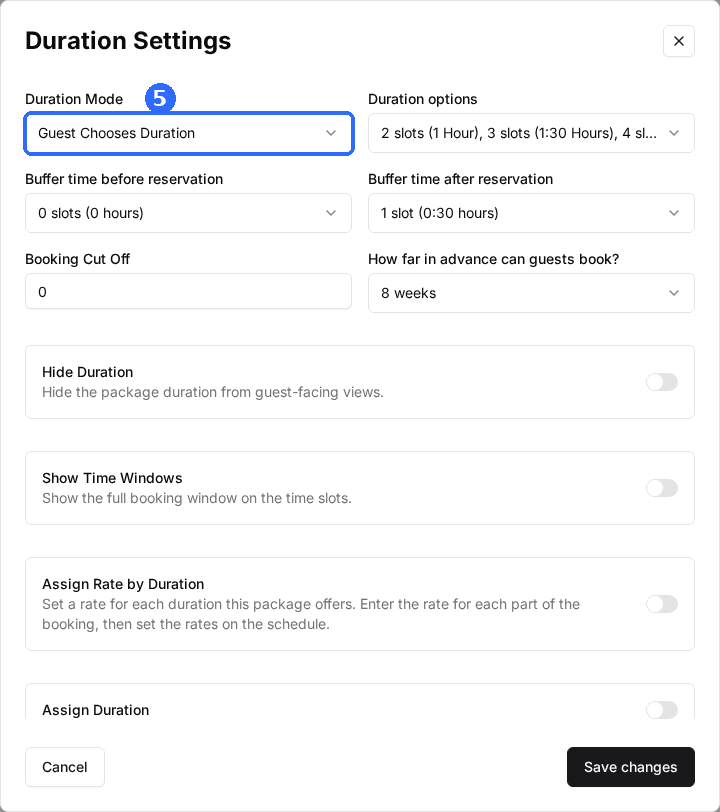
Set Duration
Most commonEvery booking is the same length, and guests don't choose.
Best for: Fixed-length activities, like a 90-minute escape room.
Guest Chooses Duration
Guests pick from the Duration options you allow (1 hr, 1.5 hr, 2 hr, and so on).
Best for: Lanes or bays rented by the hour.
All Day (fills rest of day)
A booking runs from its start time to the end of that day's open hours.
Best for: Full-day rentals and buyouts.
Add resources and a schedule
Assign a resource category
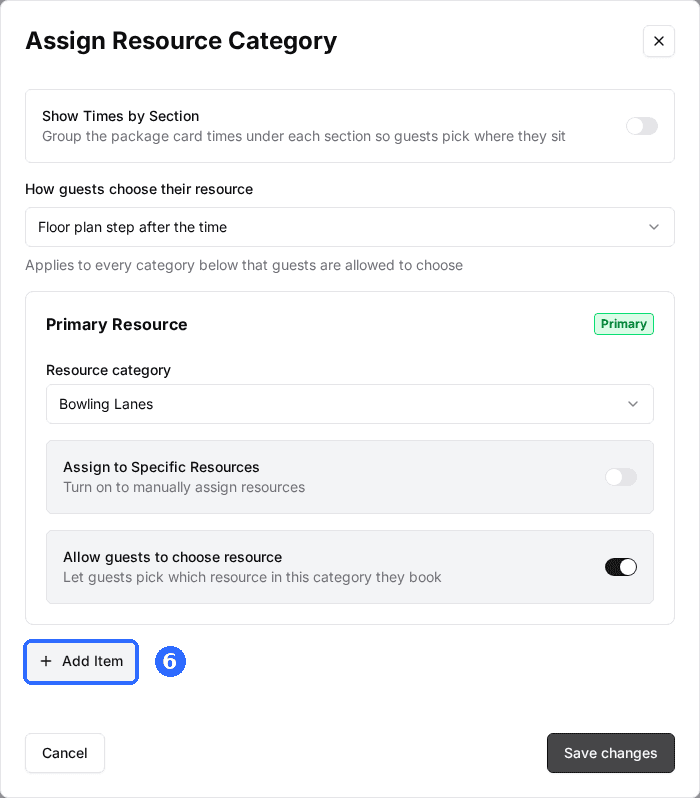
Click Edit on the Assign Resource Category card, then Add Item and pick the category this package books, such as your bowling lanes. The first row is the Primary Resource; add another row for each extra resource the package uses, like a party room. Click Save changes.
Add a schedule
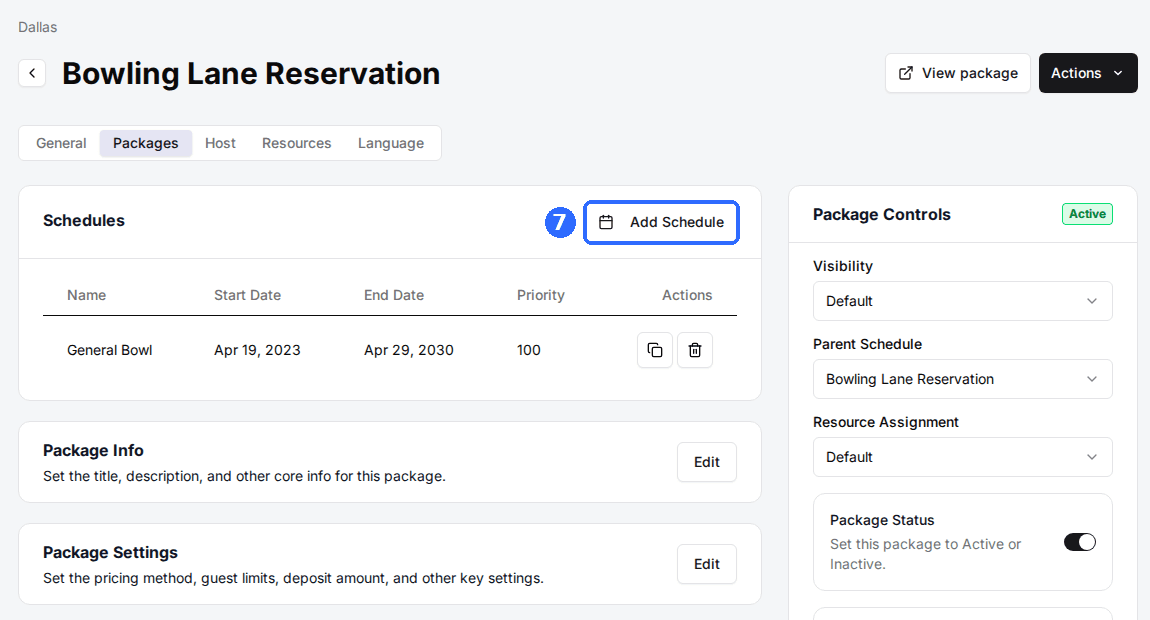
In the Schedules card at the top of the page, click Add Schedule. The schedule sets the days, times, and rate of each time slot. Most packages need just one.
Assigning resources and building a schedule each have their own guide: Assign resource categories to a package and Set up your schedule and pricing.
Put the package live
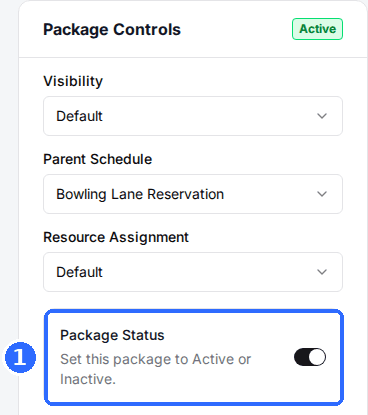
Toggle Package Status on
In the Package Controls card on the right, switch on Package Status. Until it's on, the package is Inactive and guests can't see it. Package Controls saves each change as you make it.
Verify on your reservation page
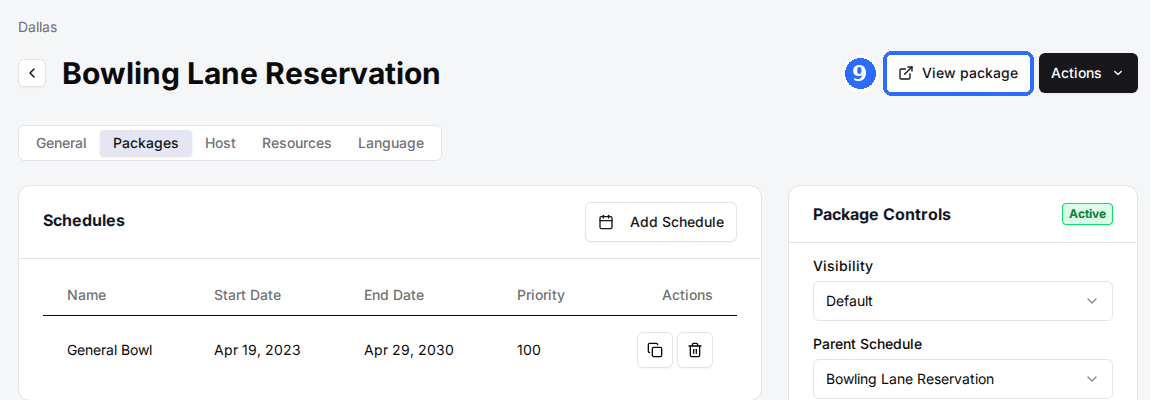
Click View package at the top of the page to open the package on your reservation page, and check its times and price.
| Field | Description |
|---|---|
| Visibility | Default shows the package everywhere. Admin Only keeps it to staff in the Host App. Frontend Only shows it to guests online but not in the Host App. |
| Package Status | Active or Inactive. Inactive hides the package from guests whatever the other settings say. |
| Package Thumbnail | The image on the package card. Click Upload Image to add a photo of the activity. |
If the page shows "Assign a resource category to make this package visible", the package's current schedule counts resources but no resource category is assigned yet. Add one in Assign Resource Category.
Other package cards
The rest of the cards are optional. Some are part of higher plans and show an upgrade button instead of Edit until your plan includes them.
| Field | Description |
|---|---|
| Cancel and Modify Rules | Whether guests can cancel or change their booking, the fees, and the cut-offs. |
| Taxes and Fees | Tax rate and custom fees for this package. See Add custom fees to an activity or package. |
| Host Settings | Host App overrides: card color, guest and duration limits for staff, QR check-in. |
| Package Language | Package-specific wording, policies, and the confirmation email override. |
| Checkout Questions | Questions guests answer at checkout for this package. |
| Package Categories | The category tabs this package appears under on your reservation page. |
| Revenue Tracking | Splits this package's revenue into categories for reporting. |
| Membership Settings | Membership rules and perks for this package. |
| Additional Activities | Activities guests can add to, or that come bundled with, this package. |
| Waitlist Alerts | Lets guests sign up to hear when a sold-out slot opens. |
| Waiver Settings | Whether this package needs a signed waiver, and which template. |
Hiding a package behind a direct link, contact-only booking, cancellation rules, and host overrides are covered in Configure advanced package settings.
Clone a package
Once one package is set up, build the next one from it. On the Packages tab, open the three-dot menu on a package's row and choose Clone, or open the package and choose Clone Package from the Actions menu. Give the copy a new name and click Save changes. The clone takes the original's settings, schedules, and resource category assignments with it.
Updated Oct 8, 2026
Was this helpful?